
Click here for more Naruto tutorials
Welcome back everyone! Today’s tutorial is on Tsunade, the most beautiful kunoichi from the Naruto world. What is it about her that’s so fascinating? Is it her gambler’s personality, blond hair or 106 cm bust? For whatever reason, there certainly is a lot of Tsunade’s fan art out there online. ^_^ If you’re interested in learning how to draw other Naruto characters, click on the Naruto tag in the tag cloud on the right of the page for all of our Naruto drawing tutorials. Let’s get our pencils and kneedable eraser ready.
Step 1
Step 1: Like with so many of our tutorials, we’ll be starting with a head circle in the middle of your paper. DonÂ’t push too hard on the pencil as this is just a construction line and will be erased later just like all the blue lines in this tutorial. Leave enough free space around to draw the rest of Tsunade’s face.

Step 2
Step 2: Moving right along, we’ll continue here in step 2 with two more major construction lines that will help us situate her features. The vertical center line should divide the head circle in half and should be much longer at the bottom. The eye line should be slightly curved and only about a third of the way up the head circle.

Step 3
Step 3: A nice short step here. We need two curving construction lines that start on the head line and extend down towards the bottom of our center line. This will be for her lower face, jaw and chin area.

Step 4
Step 4: Now we’ll take a stab at those beautiful seductive eyes of hers. We need to draw a leaf-like or almond-like shape on both sides of the center line and cut in half by the eye line. The tear ducts towards the center should be a little pointy like the end of a leaf and below the eye line.

Step 5
Step 5: Time for some facial details. The nose is quite simple- two small dashes on either side of the center line will do. A small half circle for the bottom lip, and a wavy line on top to finish up her excellent “bouche”. We’ll also draw her irises inside the eyes but not as complete circles. And lastly, add a couple of very small dashes on the tops and bottoms of the eyes suggesting her eye lashes.

Step 6
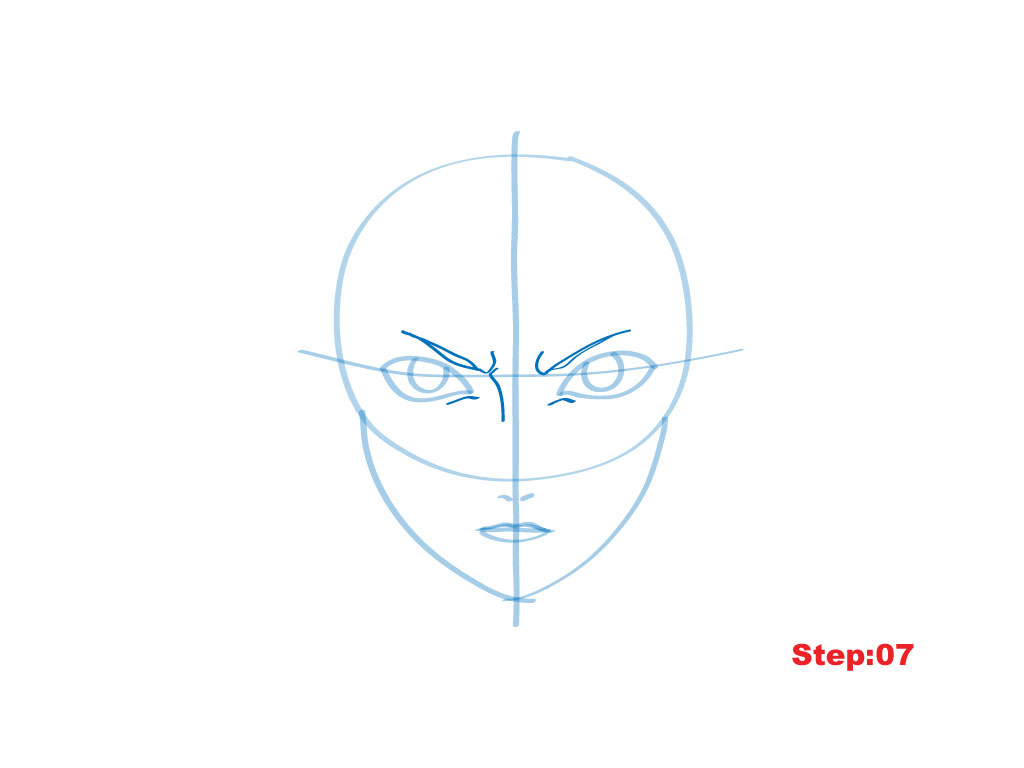
Step 6: Here, we’ll add a few more eye details. We’ve got to give her some sharp looking eyebrows, so we’re going to draw two arching hooks over her eyes. Make sure they curve up at the ends closest to the center. Also, we’ll extend the brow on the left with a line the curves slightly. Finally, a little curved dash under each inner corner of the eye and we’re all done with step six.

Step 7
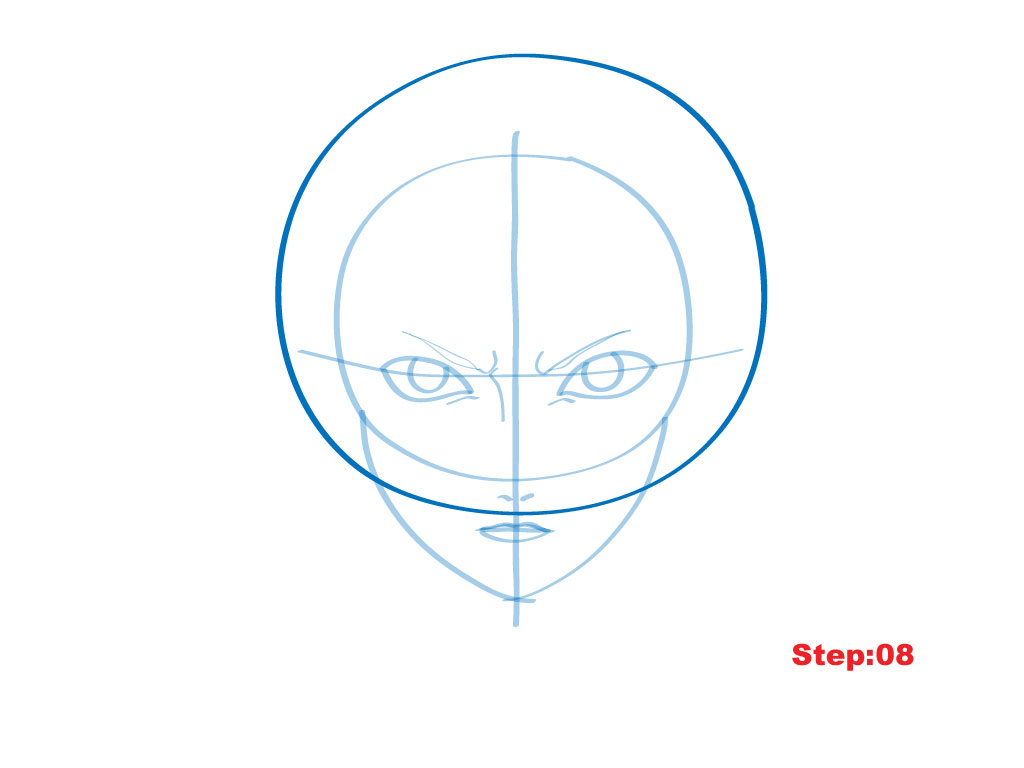
Step 7: Always feel free to lighten any construction lines along the way using your kneedable eraser at any time. We’ve got a short step here. Let’s draw a larger circle that should encompass the whole upper portion of her head and meet between Tsunade’s nose and lips. This will be for her luscious blond hair.
Step 8
Step 8: So, now that we’ve got Tsunade’s “bitch” look going on with the eyes, it’s time to switch to work on her hair for a few steps. Here, we need to draw a large “M” like shape for her bangs. The ends of the “M” should meet in a point near the outer corners of her eyes and will meet on the center line. Those are some nice “golden arches”, eh?
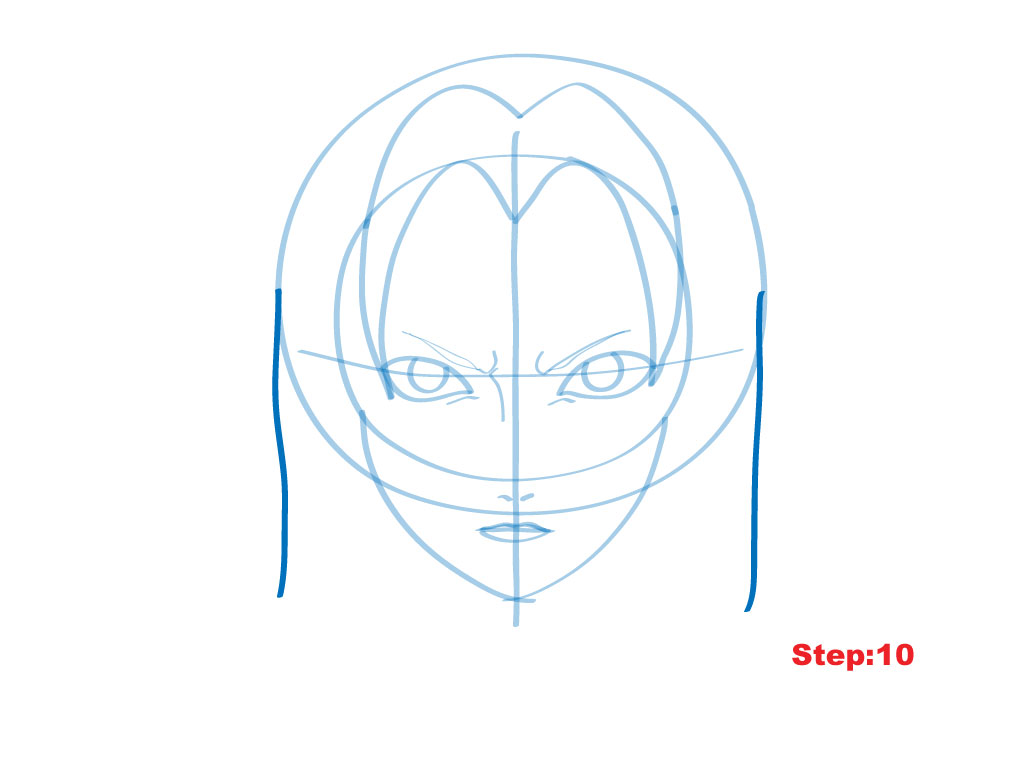
Step 9
Step 9: Another quick step for you. Again, go ahead and lighten any lines you might want to lighten and then we’ll add two vertical lines on either side of her head and touching the hair outline. They should be just a little further down than her chin.

Step 10
Step 10: We’re doing great so far. Step 10 can be a little challenging but don’t despair. If you’re not satisfied with your first attempt, erase and give it another shot, nothing’s permanent in pencil ^_^ I’d recommend starting with two short neck lines starting from the jaw line, and then add two more curving lines to outline her neck. Then, we’ll go back up to her the ends of the “M” we made in the previous steps and add her hair. The bottoms should be forked and about as long as the neck and will cover her cheeks (overlapping 3D principle). Once you’ve drawn that to your satisfaction, add two lines for her shoulders and a line curving outward from the shoulders to her hair. Lastly, we’ll put two slightly curved lines on her forehead under the arches of the “M”.
Step 11
Step 11: Again, after such a big step it might be a good idea to lighten up your lines at this point. In this step, we’ve got to add two more forked hair pieces on either side of her face. A small diamond right in the middle of her forehead on the center line will be perfect for her amulet. And we can’t forget to draw in the straight lines of the roots of her hair which go from the forehead line we drew in the previous step up to the arches of the “M” for her bangs.

Step 12
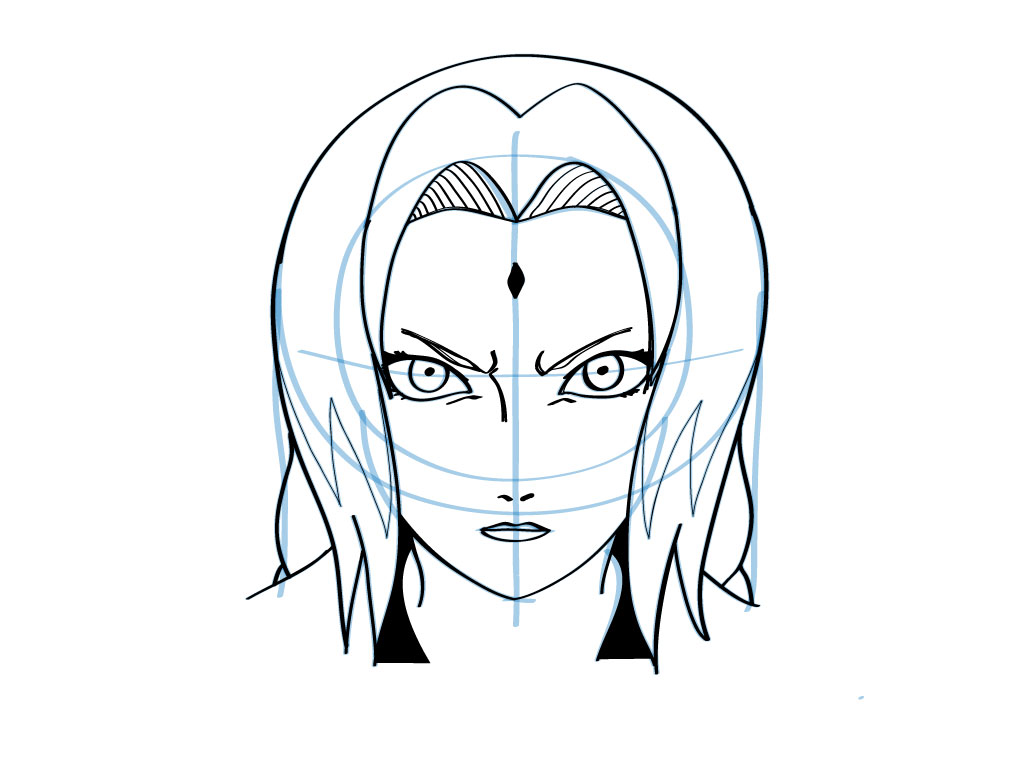
Step 12: We’re all finished with our construction lines. Now, it’s time to turn to our black pen and trace out our final lines. At first, don’t press too hard on the black pen as we can always thicken the lines in the next step. Also, be sure not to go over the second forked hair piece in black quite yet. Lighten up any remaining construction lines except the forked hair line.

Step 13
Step 13: Time for a little filler. Using our black pen we’ll fill in the diamond shape on her forehead and the spaces on either side between her neck and hair (3D shading principle). Lastly, we should thicken her eyelashes a little bit, too. Give it a try and we’re nearly finished.

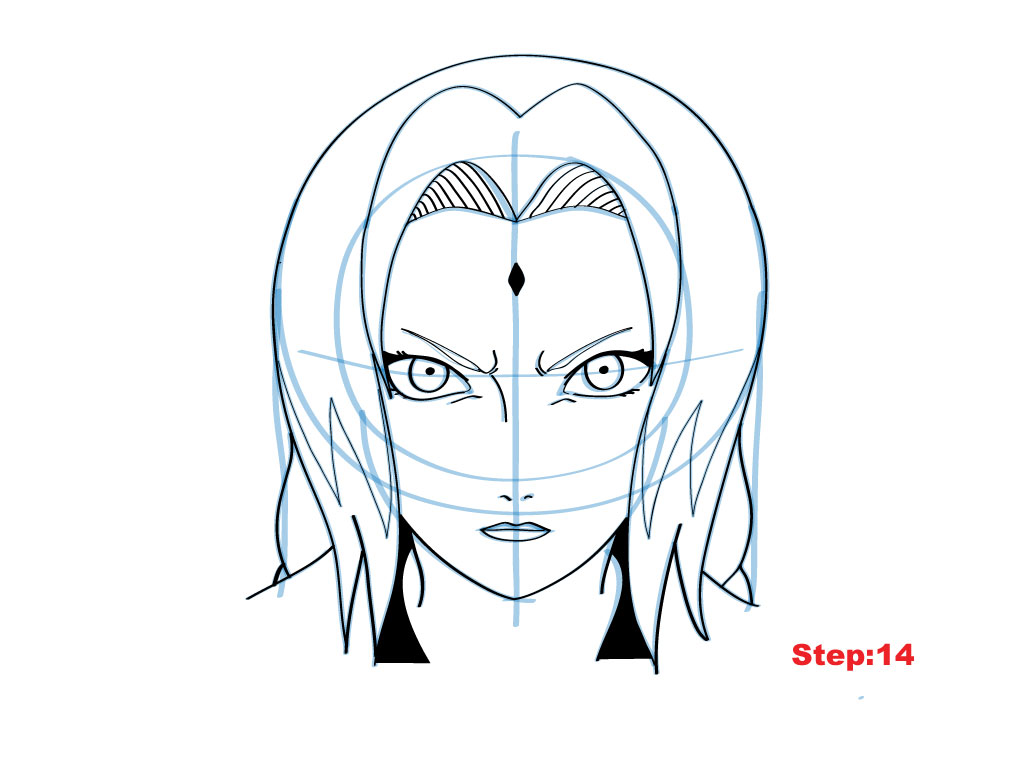
Step 14
Step 15


6 comments
wish I could follow a tutorial without screwing up :'(
Comments are closed.