

Click here for more One Piece tutorials
Great to have everyone back on How to Draw Manga in 3D. We’re going to learn how to draw Smoker from One Piece. We all give a big thanks to Tigo for requesting this one, hope you like it ^_^. If you have a favorite manga character you’d like to learn how to draw, just click on the request tutorial button at the top of the page and I’ll give it a shot. We’ve already got a couple of Luffy D. tutorials up on the site, so it seems only appropriate to do one on one of Luffy’s strongest nemesis in the series, the Marine Smoker. Named after his signature habit of never being without a lit cigar in his mouth, his name means more than just his habit. He can transform his lower body into smoke and fly! Also, his smoke mist can surround, confuse and hold on to enemies making them extremely vulnerable to his super strength. Luffy knows. Every time he sees Smoker, he takes off. If you’re interested in learning how to draw other One Piece characters, just click on the One Piece tag in the tag cloud on the right of the page. Let’s get our materials ready and learn how to draw Smoker today!
Step 1
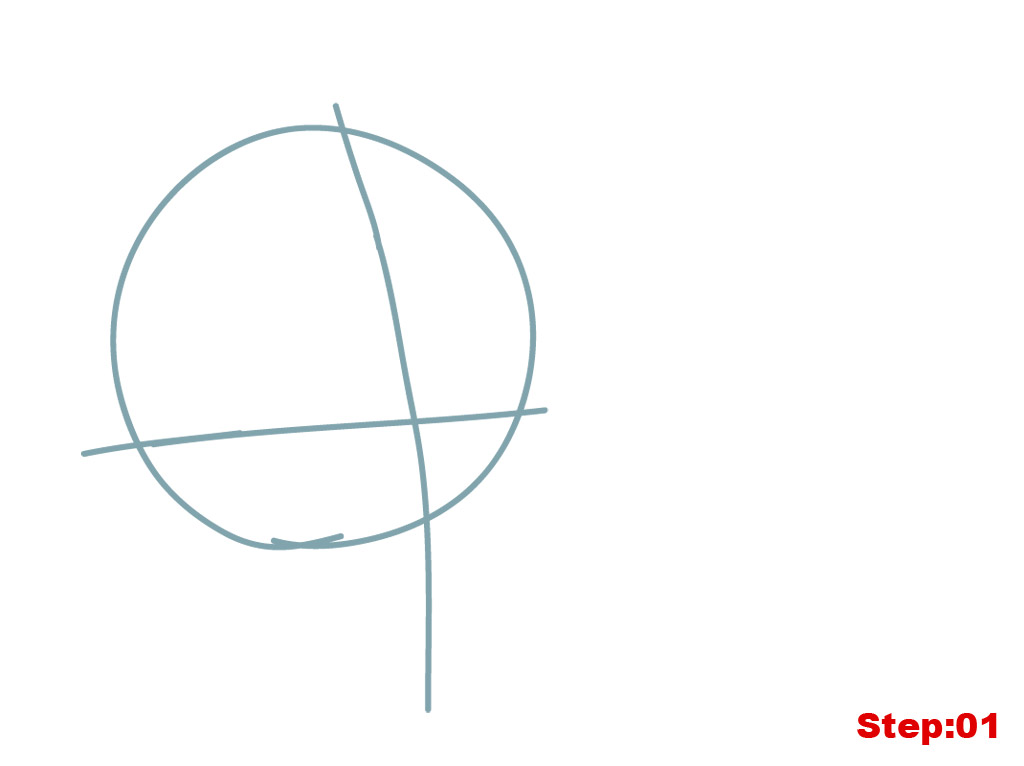
Step 1: All of the blue lines you see in the tutorial are only construction lines and will be erased later on, so don’t press too hard on your pencil. Our final lines will be in black towards the end of this tutorial.
We’re going to be drawing Smoker’s head and his puff of cigar smoke today. So, it might be a good idea to turn your paper sideways to the landscape position to draw him. That way, you’ll have more room on the right side of your paper for the smoke. Let’s begin with our head circle, eye and center lines. Let’s draw our head circle in the left/center of our paper. Go around a few times lightly with your pencil until you have a nice outline of a circle and then draw your head circle on top of your outline.
Now, Smoker’s head is turned to the left so we have to adjust our center and eye lines for that. The center line starts a little right of center of the head circle and slightly above it. It curves down to the right and then when it hits the bottom of the head circle it goes straight down and extends below the circle. Next, we’ll draw the eye line starting on the left side of the head circle, it’s about a quarter of the way up and, although the line is straight, it is tilted upward ever so slightly. The eye line should extend past the head circle on both sides slightly.
Step 2
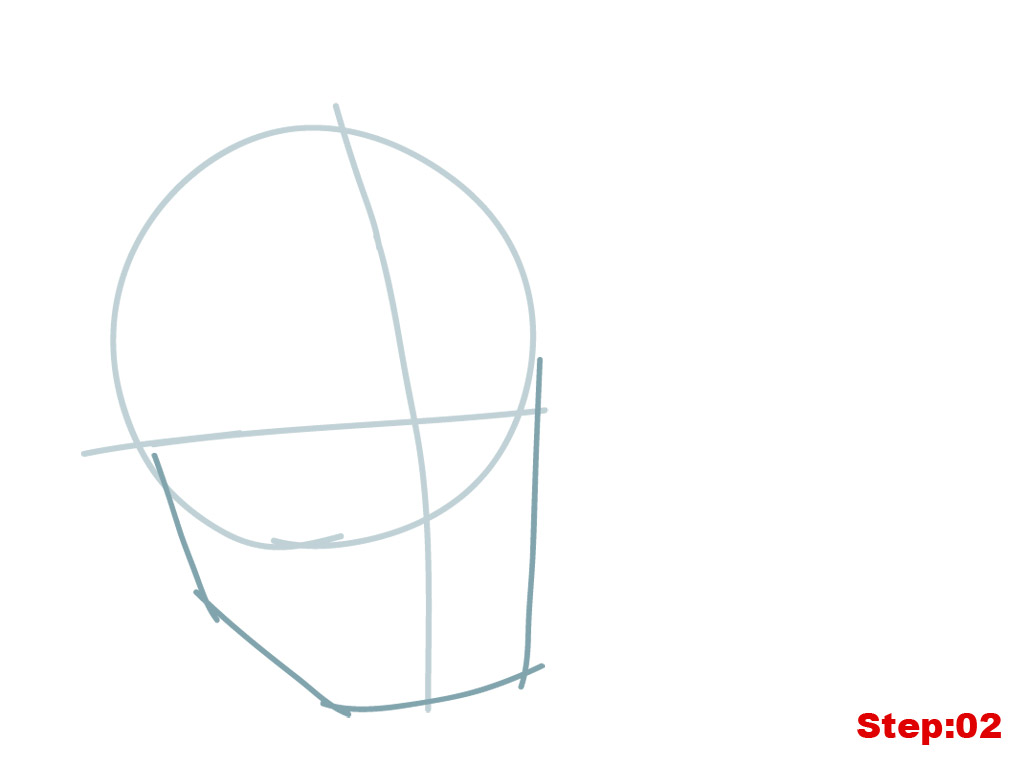
Step 02: Let’s continue by drawing Smoker’s jaw. His jaw is composed of four lines. Let’s start at the bottom of the center line where we’ll draw a fairly straight short line titled upward slightly. Then we’ll need to draw two lines connecting the head circle to the bottom of the jaw on the left and one straight line on the right. Start on the right just inside the head circle and just below the eye line. Draw your first line to about halfway point between the bottom of the head circle and the bottom of the jaw. Then, at a sharper angle, draw a second line connecting the previous line with the bottom of the jaw on the left. On the right, just draw a straight line from the bottom of the jaw on the right up to a point just outside the head circle on the right and just above the eye line. Because Smoker has his face turned to the left, the jaw should be smoother on the right than on the left, because from our perspective we wouldn’t be able to see the whole jaw on the right while the left side of the jaw would be strongly pronounced. This is an example of our 3D squashing principle, and you can try it on yourself in the mirror at home. Just turn slightly and you’ll see one side of your face smooth out.
Step 3
Step 03: Time for Smoker’s ear and hair line. We’ll begin with the ear. Draw a cup handle shape for the ear on the left. Start on the head circle just below the eye line, the top of the ear should touch the eye line, and the bottom of the ear will stop on the first jaw line on the left. Next, we have to draw the hair outline. Begin with the short line at an angle on the eye line. Then, you can draw a slightly curvy rectangle shape across the forehead area. Although the shape is inside the head circle, the very end of the hair outline on the right should just overlap the jaw line. When you’ve got that, we’ll move on.

Step 4
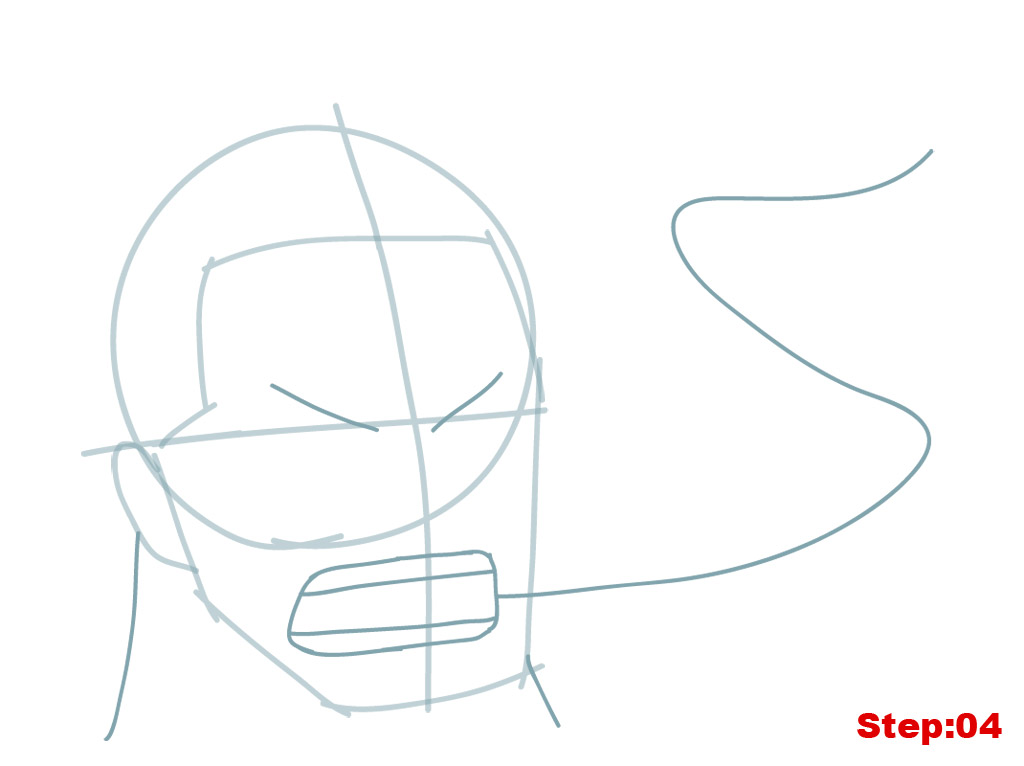
Step 04: Here, we’ll work on the mouth and a few other details. We can start with the eyebrows by drawing a diagonal line on each side of the center line pointing down toward the center. The ends of the eyebrows can overlap the eye line slightly and due to our size 3D principle the eyebrow on the left will be longer than the one on the right. Next, we’ll draw Smoker’s mouth. The mouth shape is roughly a rectangle but it’s important to note that the edges are rounded and the bottom left corner of the mouth is stretched slightly, for the same reason as the jaw is smoother on the right than the left, we should see more of the mouth shape on the left than right (3D size and squashing principle). Inside the mouth shape we should draw two straight lines for the upper and lower ridge of teeth leaving space for Smoker’s cigar in between. Next, starting on the right of the mouth shape, we’ll draw a long curving “S” shape all the way out across the right side of our paper. This line will help us to draw the cloud of smoke in the next steps. Before moving on, we should draw the two lines that make up the neck. The line on the left starts on the ear and moves out away from the head as it moves down. The line on the right, is quite short and starts just above the corner of the jaw on the right.
Step 5
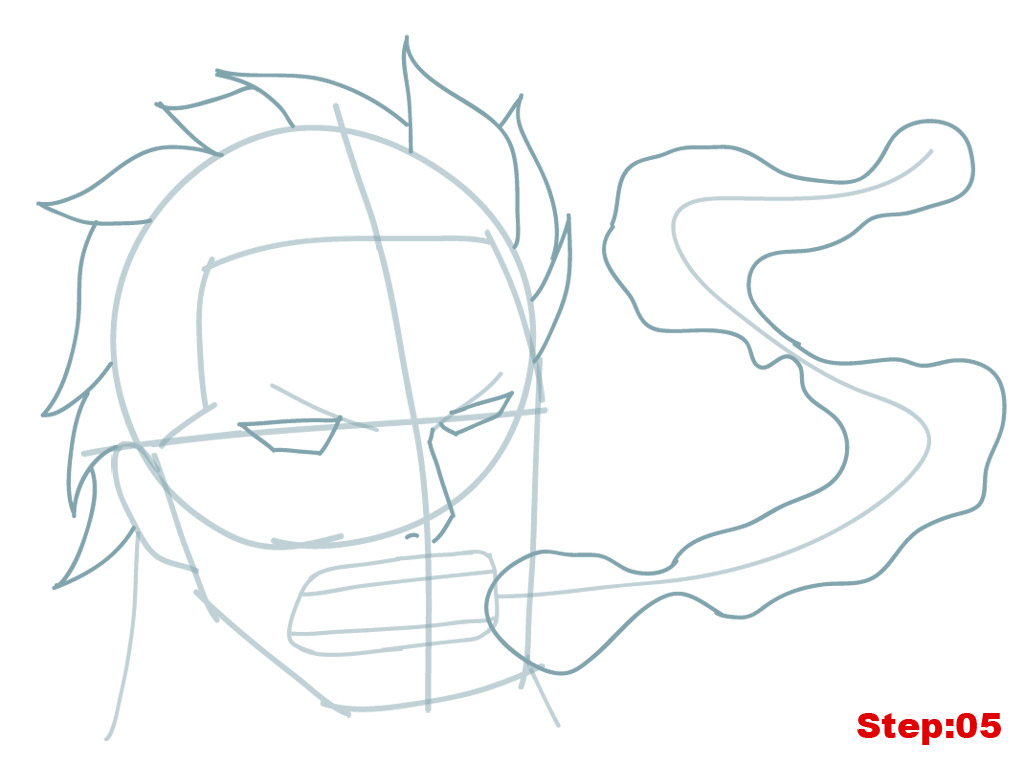
Step 05: Hair, eyes and smoke in this step, mangakas! We can start with the eyes. We need to draw an upside down trapezoid shape for the eyes on the eye line. We see the complete trapezoid in the eye on the left, but the inner corner of the eye on the right is cut off by the eyebrow. Staying right there, we’ll draw the nose which is a “Z” like shape that starts just at the bottom of the eyebrow on the right. It stays to the right of the center line and finishes up just below the head circle. Don’t forget to add the dash for his nostril. Next, we’ll draw the hair. There isn’t a perfect way of doing Smoker’s hair, so variation is to be expected. We need to draw a lot of curvy flame or leaf like shapes all the way around the head. If you’d like to follow my example, here’s how. Counting from the right, you should start with the third hair spike, it’s the only complete hair spike you can see. Then, once you have that one you can go back down and draw the other two spikes on the right and then continue around the rest of the head. The last, ninth, hair spike below the ear curves in the opposite direction to the others. Once you’ve got the hair spikes in place, let’s draw the cloud of smoke. Again there’s no perfect way of doing this. Just use the long “S” shape as a kind of center of the cloud and draw a cloud like shape all the way around with curving lines. The smoke can overlap the right of the mouth slightly.
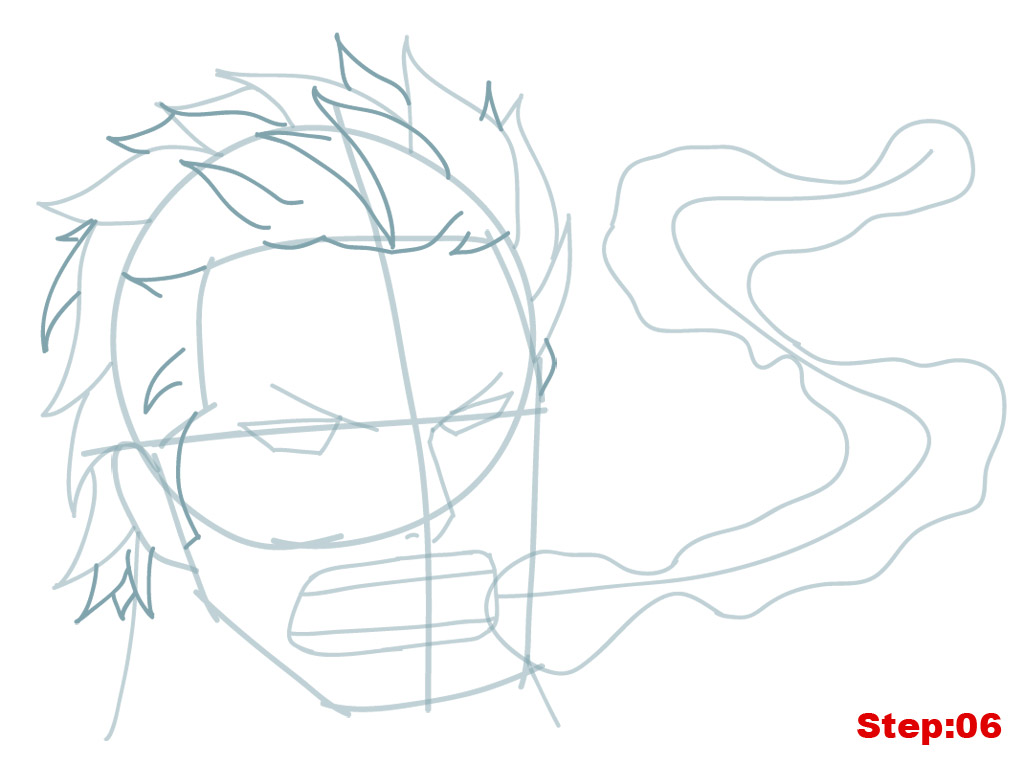
Step 6
Step 06: Another hair step here. We need to add some more hair spikes/flames in order to fill out Smoker’s hair a bit. Basically I’ve added one or at most two very small hair spikes in between each of the major spikes we drew in the previous step. There’s also a flower like trio of hair spikes on the left at the bottom of the ear that overlaps the neck slightly. Draw this by drawing the two fuller hair spikes pointing away from each other and then add the third smaller spike in the middle. Next, we should draw the curving check mark shape inside the head circle for Smoker’s sideburns that connect the ear to the hair outline we drew in step 2. On the right there’s a small “^” shape to draw just above the eye line that touches the first hair spike. Once you’ve got all that you can move into the upper part of the head and add a few more small hair spikes. We should also make the hair outline a little more rough in the bangs area and not a straight line. Got that? Great! Let’s move on.
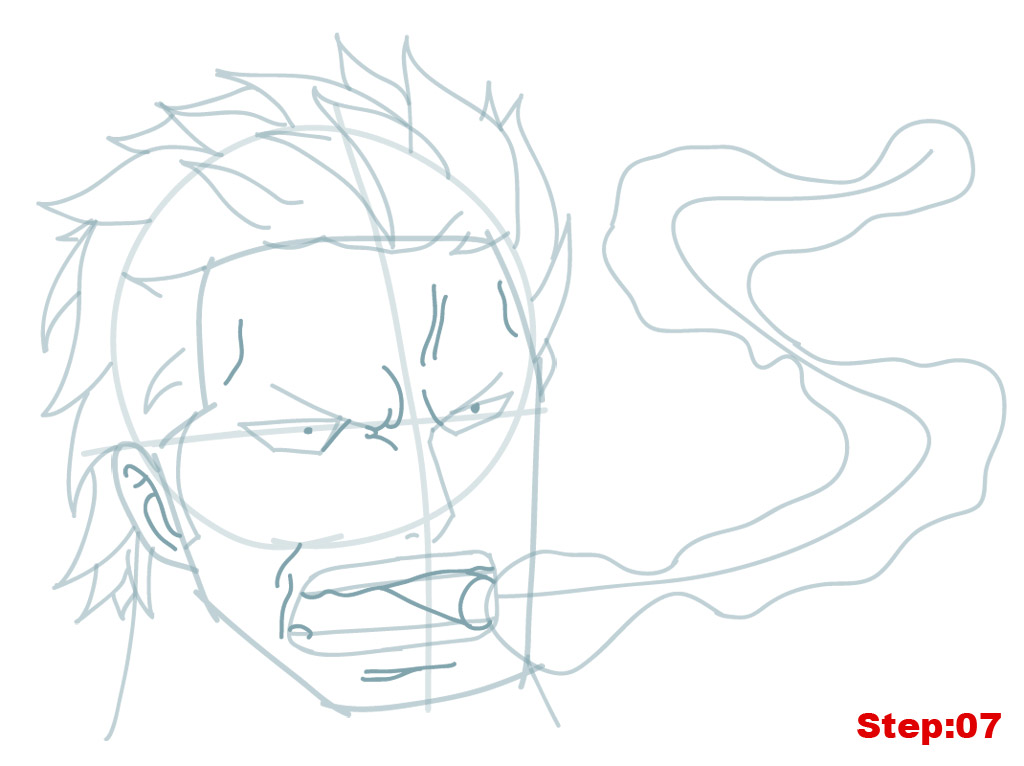
Step 7
Step 07: Some detail lines here, as well as some wrinkles and “anger” lines as well as Smoker’s cigar! Let’s get started. Begin inside the ear and draw the lines for the inner ear. Start with the longer backwards “S” shape and then add the second curving line and the dash to that. Next, there are some irregular lines on the forehead for wrinkles, one to the left of the center line near the temple area, then three on the right. Now, for the eyes. For the eye on the left, it might be best to do your best to imitate the irregular shape in the corner of the eye you can see in the image above. This is for the upper brow area. There’s also a line connecting the bottom right hand corner of the eye trapezoid to the eyebrow. And lastly, add the dot on the eye line for the pupil. The eye on the right is easier, we’ll just add a line going up from the inner corner of the eyebrow and then add the dot for the pupil just above the eye line. Now for the mouth and cigar. Let’s start by making the upper ridge of teeth less straight. Then at the edge of our cloud of smoke we’ll draw a circle for the end of the cigar and a line from the top and the bottom of the circle connecting it to the upper teeth line. Next, add the small “c” shape in the left corner of the bottom ridge of teeth for his back molar. Lastly, just draw the two wrinkle lines to the left of the mouth and the forked line below the mouth for his chin dimple.
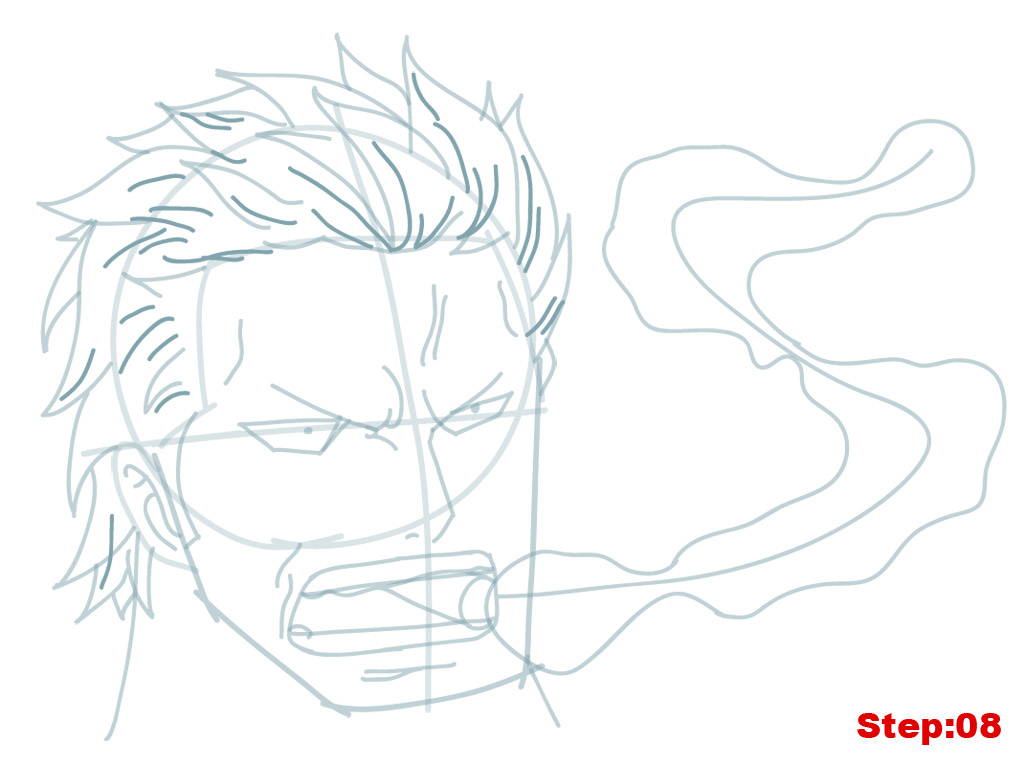
Step 8
Step 08: One last hair step, and I promise we’ll be all done with the hair. We should add some lines to the hair spikes we’ve drawn so far to suggest layers to his hair. Feel free to imitate what you see in the image above or try out your own lines. If you’re not happy with your result, no probs, just erase and give it another shot. You can never practice drawing manga hair too much ^_^!
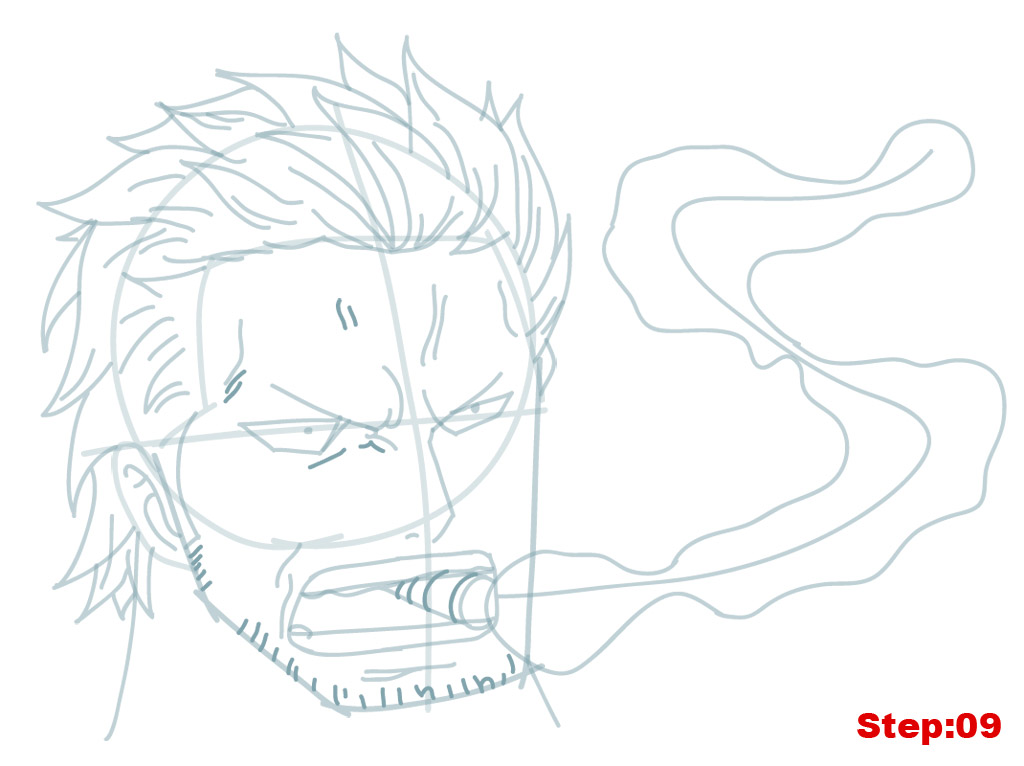
Step 9
Step 09: Just a few more detail lines and we can move on to our final trace. In this step we have to add the small dashes for his jaw and chin stubble starting on the left below the sideburn and continuing around until the bottom right corner of the jaw. Next, we can add the four “c” shapes to the cigar to make rings of the cigar leaves. And there are a few more small wrinkle lines to add in the forehead area to the left of the center line. Also, don’t forget the two lines beneath the eye on the left; one is a short straight line, the other a very small “^” shape.
Step 10
Step 10: That’s it for our construction lines, mangakas. Take out your eraser and lighten all of the lines we’ve made so far and then get out your pen and trace your final lines.

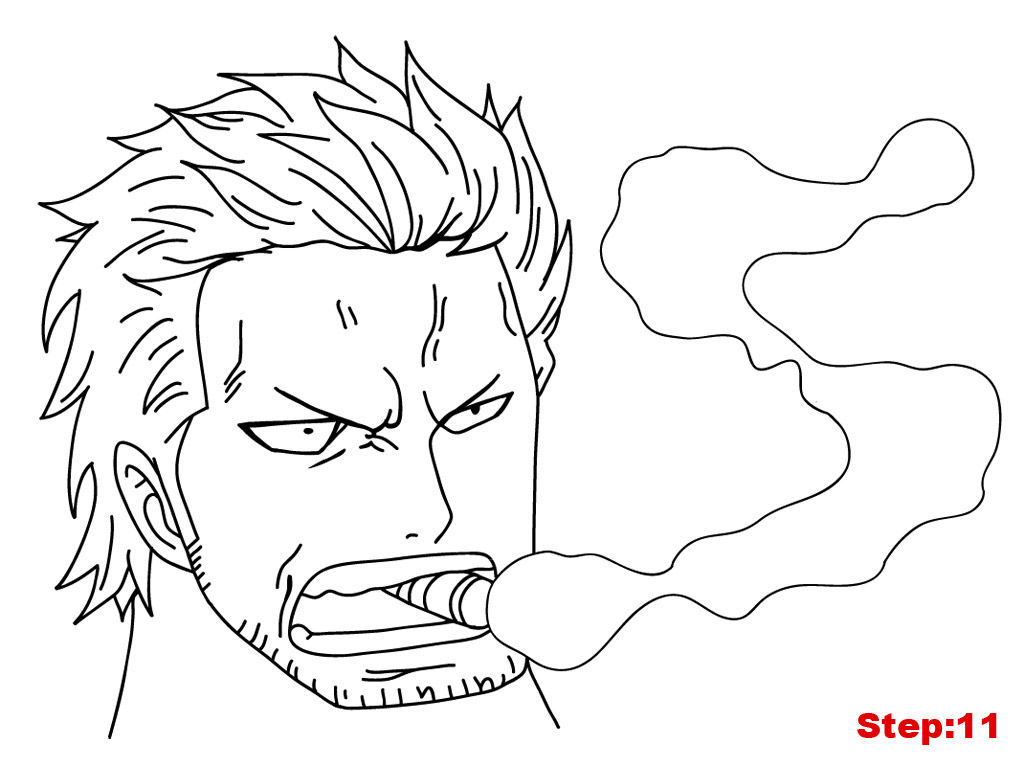
Step 11
Click here for more One Piece tutorials
Step 11: Once your ink dries, just take out your eraser and completely erase any remaining construction lines that you can see. Take a look, you’ve drawn Smoker from One Piece! If your goal is to become a great mangaka make sure to draw Smoker again from memory. Then compare the final drawing with the original and correct any mistakes you might have made. Try once again from memory. This is the best way to build a huge library of shapes that you can use in the future for your own manga characters.
Draw with passion! -_^
Hiroshi


7 comments
😀 still waiting for the others 😛
Still will need to enhance this one, because the hair part was a bit hard… but nothing really serious 😛
THAAAAAAAANKS!
Comments are closed.