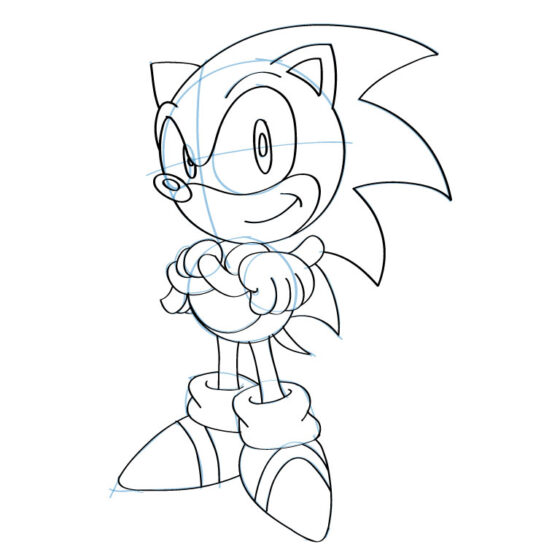
Hello mangakas, welcome back! If youÂ’re like me and loved Sonic the Hedgehog growing up (and really who didnÂ’t?) then youÂ’re going to be very happy because today we are going to draw Silver the Hedgehog. On top of that weÂ’ll also get a chance to practice the 3D principles. Have you ever used 3D techniques before? Or will this be your first time? Whether youÂ’re a pro or a beginner this website is an awesome resource to introduce you to the principles of 3D basics. This site will go over a few basic techniques that weÂ’ll be using in our drawing today so itÂ’s a good idea to familiarize yourself with them. Are you ready to start mangakas? Then letÂ’s go!
Step 1
Step 1: LetÂ’s start by drawing a compressed circle for SilverÂ’s head. It should be slightly wider than it is high. Next weÂ’ll add a second circle to the right which will serve as the basis for his hand. This circle should be about half as high/wide as SilverÂ’s head. Finally add a third circle to the left side of the head. This should be slightly smaller than his right hand and will serve as your reference for his other hand. Finally add a diagonal line roughly 1/5 of the way up SilverÂ’s head to act as our eye line for future steps.
Step 2
Step 2: Here we begin to add the famous hedgehog “spikes”. Begin by drawing a curved line on the lower portion of the head for Silver’s mouth. This should look like a lower case “m” and will give us a reference point to add details to later on. From this “m” we’ll add a vertical curve that extends beyond the head and will begin to form his spikes. Next we can add two elliptical shaped circles inside each of his hands to create his palms. Extend a straight line from the hand on the left to his mouth to form an arm. And finally we’ll draw a curved “u” shape which begins and ends slightly askew from his mouth. This will be basis of his torso.
Step 3
Step 3: Now the figure starts to really take shape. To the left of the mouth weÂ’ll add a peanut shaped oval to serve as his nose. From here weÂ’ll add a curved line at a 45 degree angle beginning at the upper left corner of his mouth and extending out past his head. Next weÂ’ll add a small oval between our last line and the mouth to form SilverÂ’s eye. Add in a small dash for his mouth and the base of his face is set. WeÂ’ll now add two bent lines to the base of his torso for legs, and two more curved lines beginning at the midpoint of the face and extending to the same length as SilverÂ’s other spikes. Finally add an oval shape at the midpoint of the arm and a slightly larger oval to the base of his hand and weÂ’re ready to move on.
Step 4
Step 4: Here we begin to build on our previous lines and near completion of the face. By now we have 4 established “spikes”. Add a curved line to each of the first three spikes (starting from the left) which will curve to the right and end at the top of the head. Next, add a curved line which follows the contours of the face to the remaining spike. We’ll look to even out the head by adding a 5th spike to the left of the face which will begin just above the nose and extend out past the face before coming back and ending at the base of the next spike. You can now add a small dash from the midpoint of the nose upwards (this will form the 2nd eye). Follow this up with two similar dashes to the right of the existing eye to give it that classic “hedgehog look”. Next, use two lines to connect the ovals on Silver’s arm to form his “cuffs” (after all, what’s a hedgehog without cuffs?). And finally add two “olives” (oval within an oval) to the base of his legs, followed by an additional oval underneath each. Starting to take shape now isn’t it?
Step 5
Step 5: Now weÂ’ll start to add detail to the face and torso. Begin by drawing an inverted V on the base of the spike furthest to the right. Follow this up by immediately adding a smaller V within it. Next weÂ’ll add a sideways V to the spike 2nd from the left. These will serve as his ears (Note: when drawing the ears, picture a shark fin, after all, this guy is built for speed!). Now weÂ’ll add smaller ovals to the eye and nose, and will mimic the effect for the left eye as well (these will come in to play when weÂ’re shading later). Finally, weÂ’ll add a large V at the midpoint of the torso, followed by a jagged line at a 45 degree angle just above to give Silver his famous scruffy looking neck line.
Step 6
Step 6: This stage can be a bit tricky as weÂ’re going to finish up the hands and legs, but hang in there! Begin by adding four sausage shaped lines to each hand. Remember to make them varying lengths to simulate fingers (take a look at your own hand for reference when determining lengths). Next weÂ’ll add two curved lines that begin at each inner circle within the hand and extend out past the left cuff and to the midpoint of the torso respectively (these will be the thumbs, and if done correctly, should be pointing at each other).
Follow this up by adding complementing lines on either side of the left arm & two legs we drew earlier to give them some girth (should follow the same contour lines). Like we did with the arm cuff, we will now add two lines to join the ovals on either leg. Finally weÂ’ll draw two circles with slightly squished bases under each leg and join them to the leg cuffs with a slightly bent line. Keep in mind these will serve as our feet so try to keep them in line with the direction of the legs!
Step 7
Step 7: Here comes some more detail! WeÂ’ll start by adding an inner circle to the existing circle on each palm. Next we can draw in a W shaped line starting at the base of the finger furthest to the left and ending at the midpoint of that handÂ’s thumb. On the other hand we begin by adding a crescent moon shape that begins at the index finger and ducks behind the thumb (remember to take your time at this stage, thereÂ’s a lot going on but weÂ’re almost there!). The base of the moon shape should end at the midpoint of the hand. Add a small bent Y shape to the right hand beginning at the tip of the thumb and connecting with the moon shape we just created. This will form the outline of SilverÂ’s arm.
Next we can add a U shape just underneath the right hand and two small lines to connect the palm circle to the cuff and we can really start to see our drawing come to life. We can now add the final spikes on the right hand side by adding a large sideways V from the spike above the eye to the midpoint of the right hand (donÂ’t worry about drawing over the hand, we will be erasing this later). Follow this up with a smaller V from the torso to the cuff and another sideways V near the base of the torso we have our hedgehog spikes and tail in place. The boots are fairly straight forward as we add two diagonal lines from the base of the leg cuff to either side of the foot (remember to follow the direction of the leg). Next add two square based UÂ’s to the base of the leg cuffs and two lines that follow the contours of the foot base and youÂ’re ready to move on.
Step 8
Step 8: This is another step thatÂ’s all about the details. Begin by adding two curved lines that run parallel to each other to the middle of each arm cuff. Next weÂ’ll work on the left foot. Begin by adding another square based U inside the one you just drew. Just above, weÂ’ll complete the energy line in the middle of the leg cuff by adding similar parallel lines to the ones in the arm cuff except with a small dip at the midpoint to follow the contours of our boot. Next we can draw two bent lines that extend from the square based U to the edge of the circle that is acting as our foot. Add a sideways U to act as a crease in the boot and youÂ’ve got yourself some feet built for speed! Repeat the above steps for the other foot and move on.
Step 9
Step 9: Now that weÂ’ve got all the construction lines finished we can begin lightening all of them before we begin the inking process. When using your eraser remember that it is a good idea to stamp your lines to lighten them rather than dragging it (as this could damage your drawing). Once the lines are properly lightened, get your ink out and begin to trace. It is usually easiest to focus on getting a good outline drawn before worrying about filling in areas like the eyes. Use the picture above to make sure you are only tracing the areas you need to and not adding in any construction lines accidentally.
Step 10
Step 10: Once your ink dries, erase all remaining construction lines completely. Touch up any areas that need filling (i.e. the eyes and nose).
Step 11
Step 11: If you donÂ’t plan on colouring in your sketch then you are done. If you want to take this thing the whole way then grab your colours and use the above as a reference. I recommend using hues such as aqua, gold, silver, and lilac to complete the drawing but this is where you can get creative and use whatever youÂ’d like!
And there you have it, a completed Silver the Hedgehog sketch. Hope you enjoyed this tutorial!
RememberÂ… If your goal is to become a great mangaka make sure to draw Silver the hedgehog again from memory. Then compare the final drawing with the original and correct any mistakes you might have made. Try once again from memory and continue this process until you are happy with the result. This is the best way to build a huge library of lines and shapes in your head that you can use in the future to design your own manga characters.
Draw with passion! ^_-
Hiroshiman
Text by Goku


1 comment
Comments are closed.