

Happy Holidays, mangakas! Or at least it is where I am ^_^. We’ve got a great new tutorial to keep you busy while I’m opening presents for Christmas, ^_-. We’re gonna draw Akito Takagi, aka Shuujin, from Bakuman requested by Straw Hat. Shuujin is an aspiring mangaka like us, and he teams up with Mashiro to start their own manga team. He’s the brains behind the project and writes most of the text letting Mashiro concentrate on the drawing. We’ve already got Mashiro’s tutorial here, so check it out if you want to draw the pair. We’ll be back next Wednesday, right after the holiday, with some more drawing tutorials for you. Feel free to post your requests. I’m really looking forward to another great year of manga drawing. Let’s get our materials ready and learn how to draw Shuujin!
Step 1
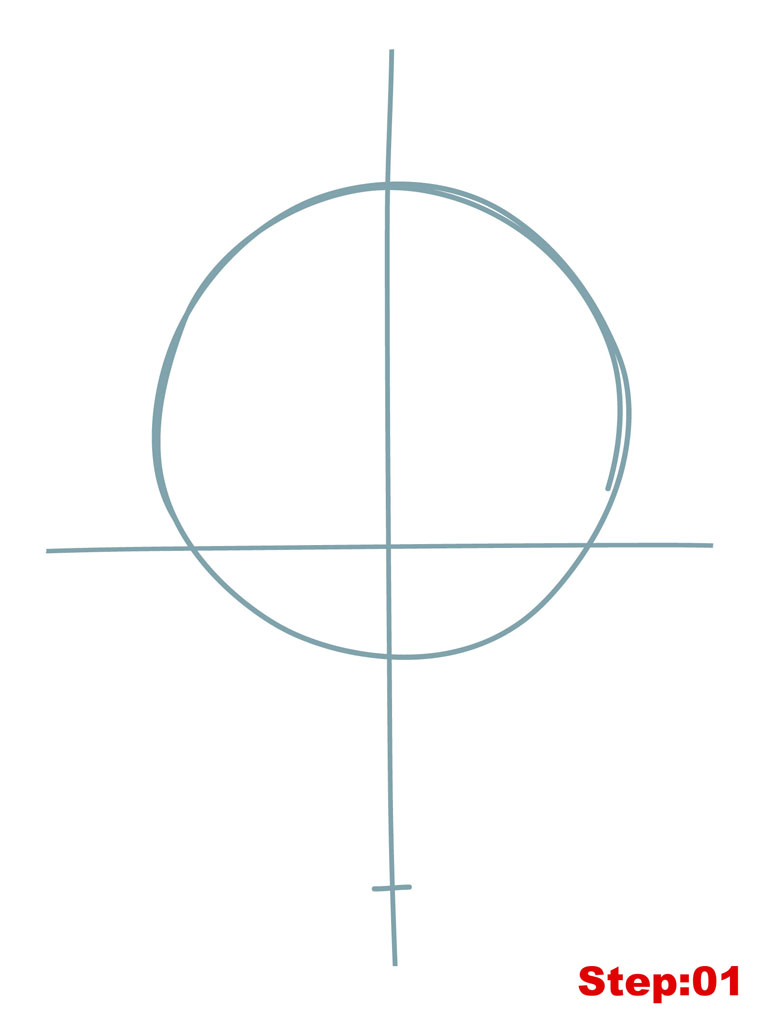
Step 01: All of the blue lines you see in this tutorial are only construction lines and we’ll be erasing them later on. So, it’s important not to press too hard on your pencil when drawing these lines. You’ll see our final lines in black towards the end of the tutorial. We’ll start by drawing a fairly large circle in the middle of our paper.
Pro Tip: As it can be quite difficult to draw a perfect circle I recommend going around with your pencil a few times very lightly to get an outline of a circle and then draw your actual circle on top of that. It always helps to have a guide ^_^.
We’ll also add our center and eye lines and chin mark in this step. We’ve got Shuujin looking at us straight on so no need to shift or tilt our construction lines. We’ll draw our vertical center line cutting the circle in half and extending both above and below the head circle. Our horizontal eye line is about a quarter of the way up the head circle and flat. Then, let’s make our chin notch on the center line below the head circle. It’s about half a head circle below the bottom of the head.
Step 2
Step 02: Now, we’ll draw our jaw line and the bang line for the hair. The jaw line is symmetrical as he’s looking at us straight on. We’ll start on the left where the eye line touches the head circle and draw a line that curves inward down to the chin notch. From here, we’ll draw a line curving back up to touch the head circle on the right at the eye line. The chin should be rather pointy but if it’s too pointy you can round it out a little bit. Next, we’ll draw the bang line which looks a bit like an “M”. On the left, it starts where the eye line meets the head circle and finishes up on the right just below the eye line.

Step 3
Step 03: Let’s outline a few facial features in this step. We’ll start with the eyes and we’ll just be drawing the top half in this step. On the right, we’ll draw a “(” line on the eye line, the left corner of which will dip just below the eye line. On the left, we’ll draw a similar “( shape but the inner corner is a straight line and goes just below the eye line. Moving down, we’ll add the small line curving upwards on the center line for the nose, the right side will be longer than the left side. Below that we’ll draw the longer mouth line that curves down at the ends. And, lastly, another small “(” line for the underlip. Great job, everyone!

Step 4
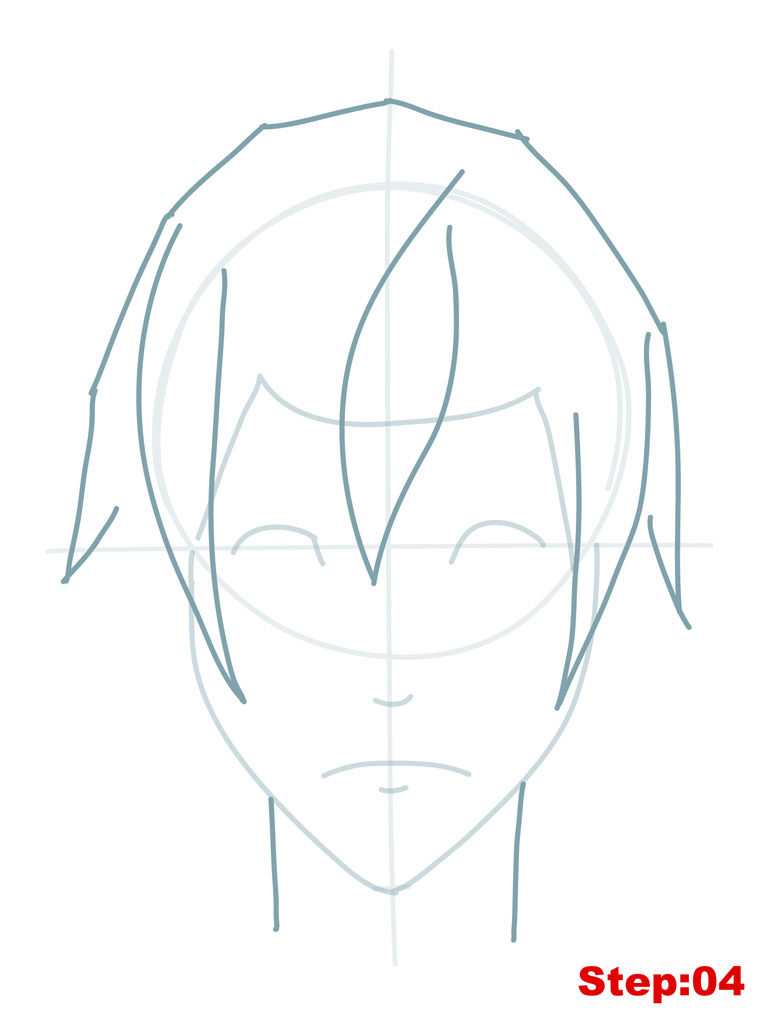
Step 04: Moving right along. It’s time to start working on Shuujin’s hair. But first, we can add the two vertical lines for the neck coming off the jaw line. Here’s a tip for drawing the hair. We’ll actually start above the head circle on the center line. As you can see the hair outline isn’t a smooth “halo” shape but is more like a STOP sign with edges. So, starting up on the center line above the head and going to the left we’ll draw four lines creating the four sides to the hair. The lower two should be longer than the upper two lines and the bottom of the last line will just cross the eye line outside of the head circle. Then we’ll just add a last line to form a hair spike at the end. Going back up to the top, we’ll do the same thing to the right except there are only three lines instead of four. Be sure to form the hair spike at the end of the third line. Next, we’ll draw the three large hair spikes you see in the mage above. The hair spike on the left will extend down to the cheek area and it starts pretty high up on the head. The middle hair spike is more leaf shaped and starts and ends to the right of the center line. The last hair spike on the right also overlaps the cheek area and intersects the point of the head circle and bang line.
Step 5
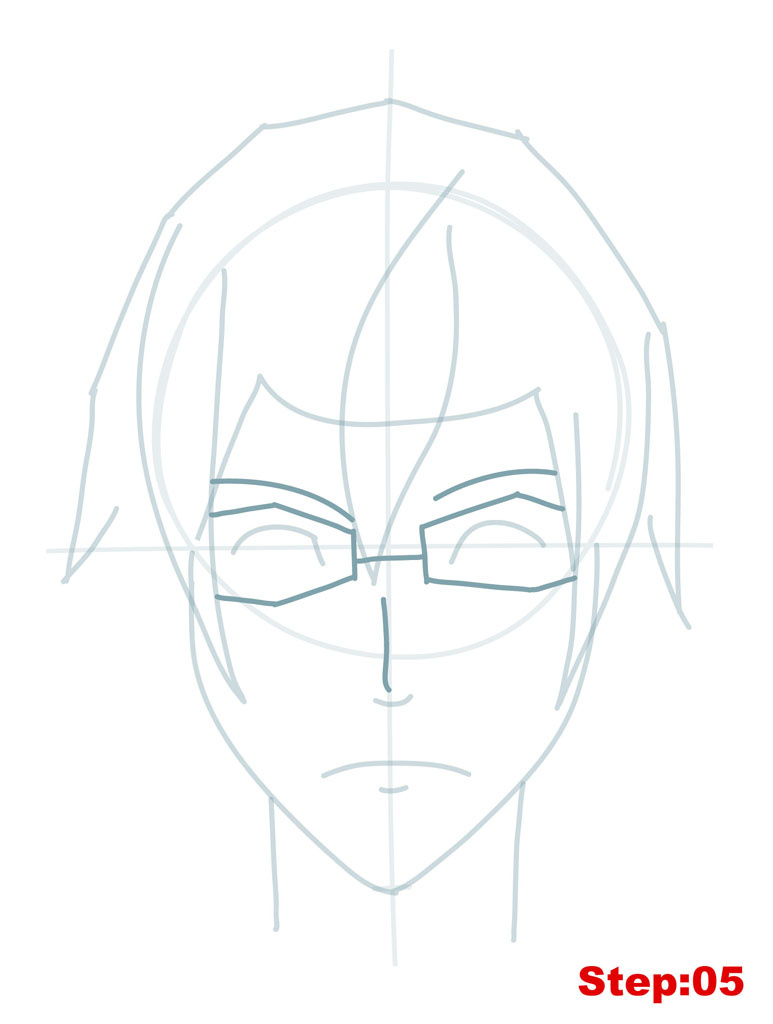
Step 05: Alright, everyone, we’re gonna do Shuujin’s glasses in this step. They should be septagonal in shape but the outer edge of the glasses are hidden behind his hair, so we can use the hair spike on the left for the left line and the bang line and hair spike on the right for the right edge. Starting on the left draw the five-sided shape for the glasses. Then we’ll draw the same shape on the right and a line between them to connect the glasses that just crosses the tip of the middle hair spike. Then, we’ll draw the “(” line over the eyes for the eyebrows. On the right the eyebrow is a little shorter than on the left. Before moving on, let’s draw the outline for the ridge of the nose on the center line with just a small dent at the bottom. The nose line should stop above the line for the bottom of the nose.
Step 6
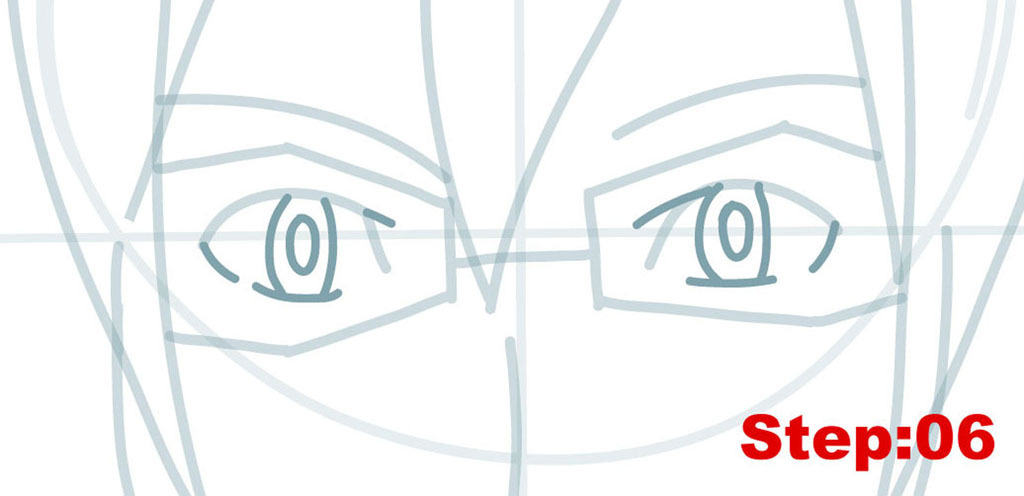
Step 06: Zooming in on the eyes for a second, let’s do some detail work. We’ll start by drawing the small curving line for the bottom eye lid just below where we want to put the irises and pupils. When we’ve got that in place, we’ll draw the “(” and “)” lines for the irises in both eyes and then add a small vertical ellipse (taller than wide) on the eye line. Lastly, we need to add another short curving line to the bottom of the eyes starting in the outer corner. It should not touch the line we drew for the lower lid under the pupils. In the top inner corner of both eyes, there’s another small dash line we should add, shorter on the left than on the right.
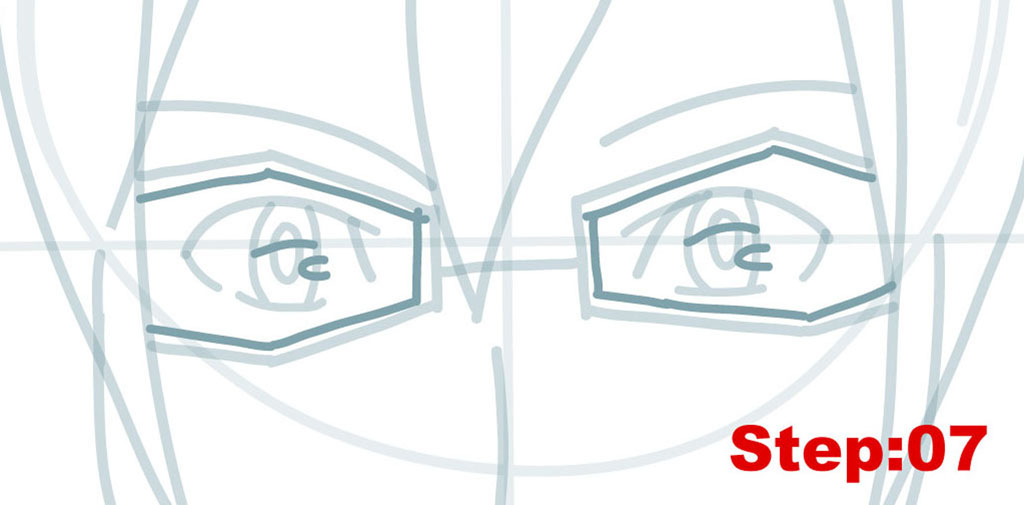
Step 7
Step 07: Sticking with the eyes, we’ll continue to do some detailing. Firstly, we’ll draw the curving line just on or above the eye line that cuts the irises and pupils in two. Then in the lower right half of the eye we’ll draw the sideways “U” shape. Lastly, we’ll draw a parallel outline of the glasses just inside the lines we’ve already done. That way the rims of his glasses will have some thickness.
Step 8
Step 08: Back for more hair! Begin on the left side where we will draw two more hair spikes between the hair outline and the jaw line. Then, we’ll add the “z” line that stops on the neck to add two more spikes. Then, jump over to the right side of the head, where we’ll draw one hair spike and then a “z” line that stops on the neck to give a grand total of three more hair spikes on the right. Then to the center and the forehead where we will draw two hair spikes to the left and two to the right of the center leaf like hair spike we already have. These spikes are shorter than the center spike but on the right they can overlap the top of the glasses slightly. Finally, up at the top of the head/hair we can add the “^” line to the left of center and then the “m” line to the right of center to give the hair some shape. That’s it for our construction lines, let’s get tracing.

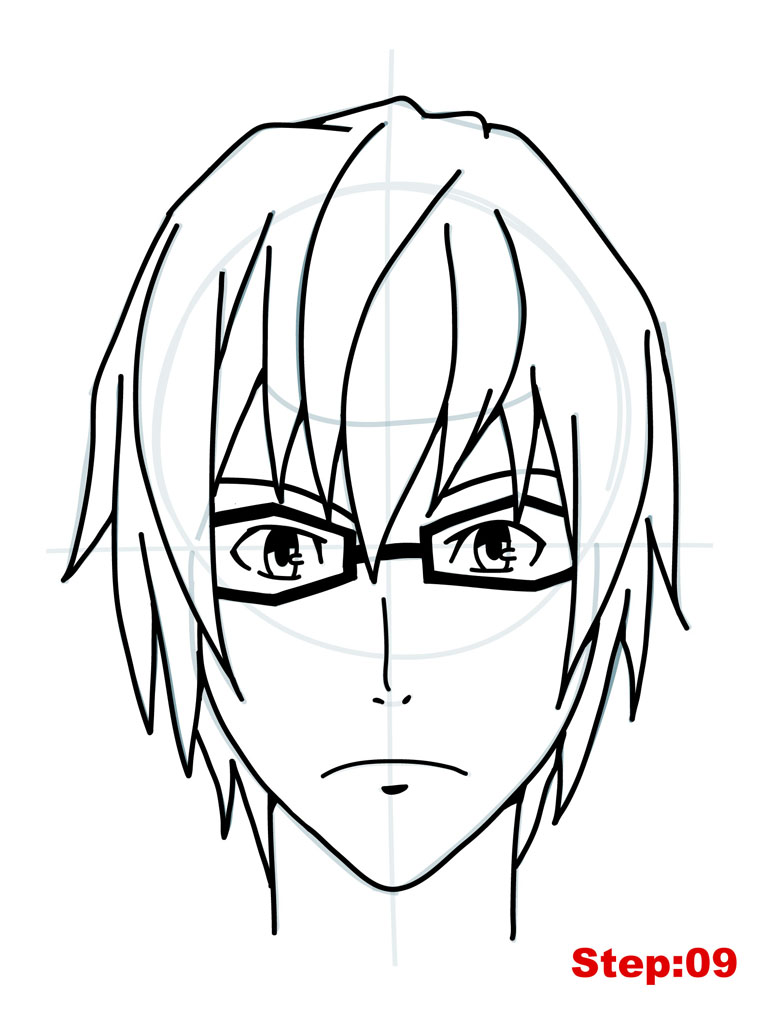
Step 9
Step 09: Use your eraser to lighten your construction lines. Then, take out your pen and trace out your final lines. The lines for everything except the nose and mouth should be pretty thick so if you trace them once and they aren’t thick enough, just go over them again to give the lines some thickness. We just want a couple of dots under the nose line for the nostrils and not a complete line. One really important place to focus on is the eyes. We want the lines that make up the eyes to be thick. And inside the eyes we want to fill in the pupil and the top half of the iris under the line we drew in step 07. We also want to be sure to trace the “u” shape in the corner of the iris. Before moving on, we can use our pen to fill in the rims of Shuujin’s glasses and the mark under his mouth.
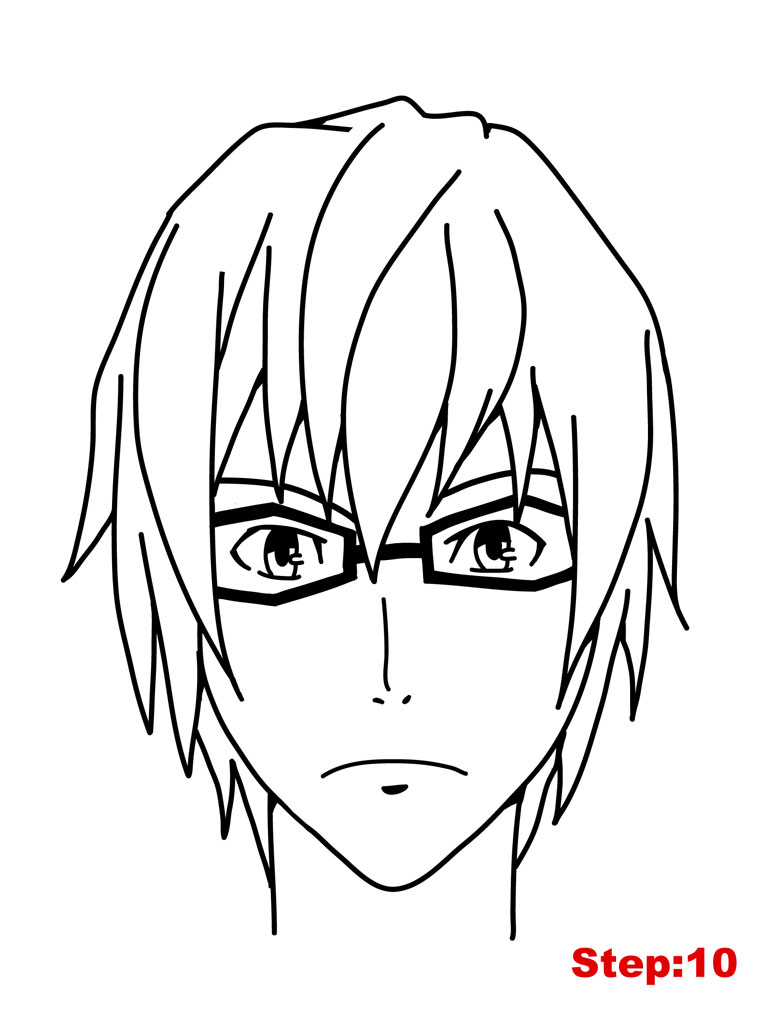
Step 10
Step 10: Wait a few minutes for your ink to dry and then completely erase any remaining construction lines that you can see. If you skip ahead to step 11 you’ll see that we’re going to do some shading in the last step. To prepare for that you can make some construction lines very lightly in pencil to mark off the areas you want shaded. We definitely want to do the area under the chin, so you might want to add a curving line on the neck under the chin and we’ll shade in the area above it. Also, we’ll want to shade the tips of the hair on both sides and some spots under the hair spikes on the forehead.
Step 11
Step 11: Using my grey marker, I’ve filled in those areas I mentioned in the last step: under the hair spikes on the forehead, the tips of the hair on the right and left, just under the chin and lastly, the lower part of the irises of the eyes that we left empty before. Once my ink dries I can finally say that I’ve just drawn the scholarly Shuujin from Bakuman!
If your goal is to become a great mangaka make sure to draw Roy again from memory. Then compare the final drawing with the original and correct any mistakes you might have made. Try once again from memory. This is the best way to build a huge library of shapes that you can use in the future for your own manga characters.
Draw with passion! -_^
Hiroshi


3 comments
Comments are closed.