Click here for more One Piece tutorials
We have a very special day today! The most requested tutorial of all time has been finally finished! ^_^ Say hello to Zoro after timeskip from One Piece.
As always all the blue and green lines are just construction lines and will be erased later so do not push on your pencil too much ^_^ I will try to be super efficient with text so will only describe steps that require some explanation.
Step 1
Centre line is slightly more to the left and both lines are tilted to the right.
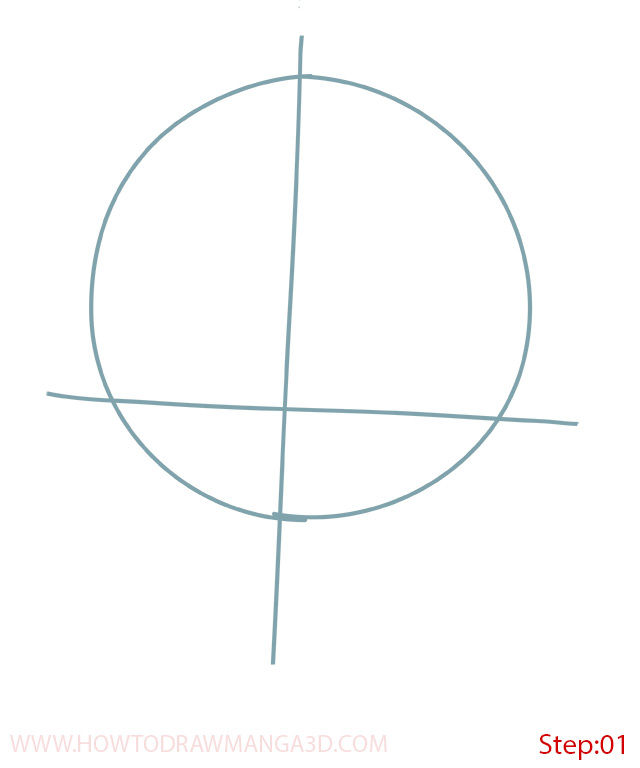
Step 2
Jaw line on the left isn’t completely smooth as the Zoro’s face is turned slightly to this side.
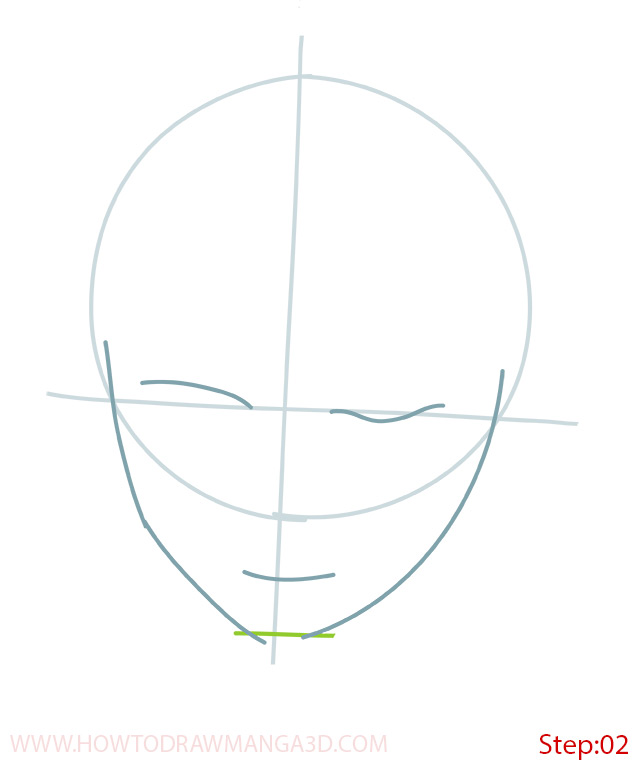
Step 3
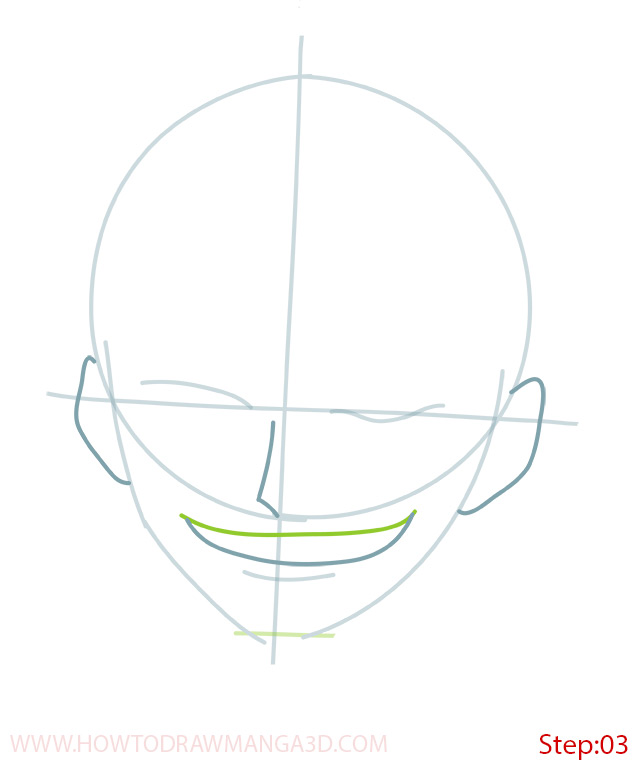
Step 4

Step 5
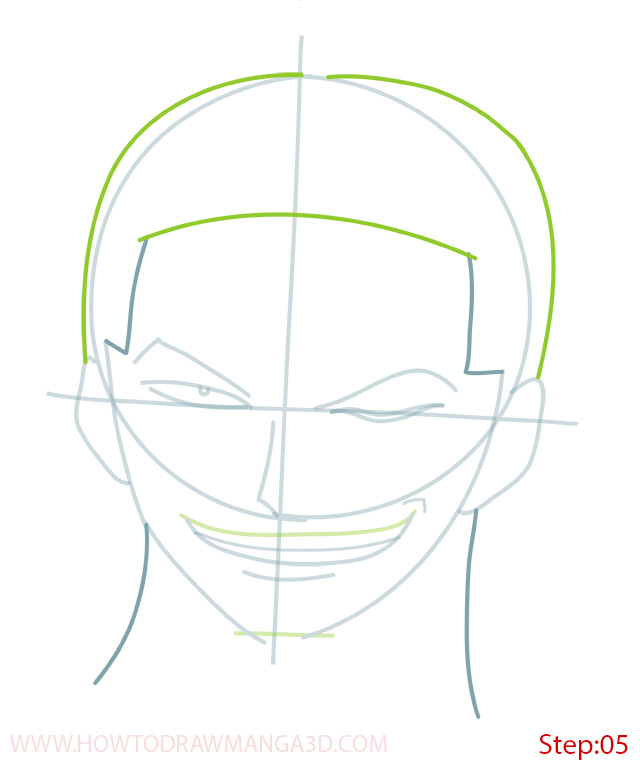
Step 6
Step 7
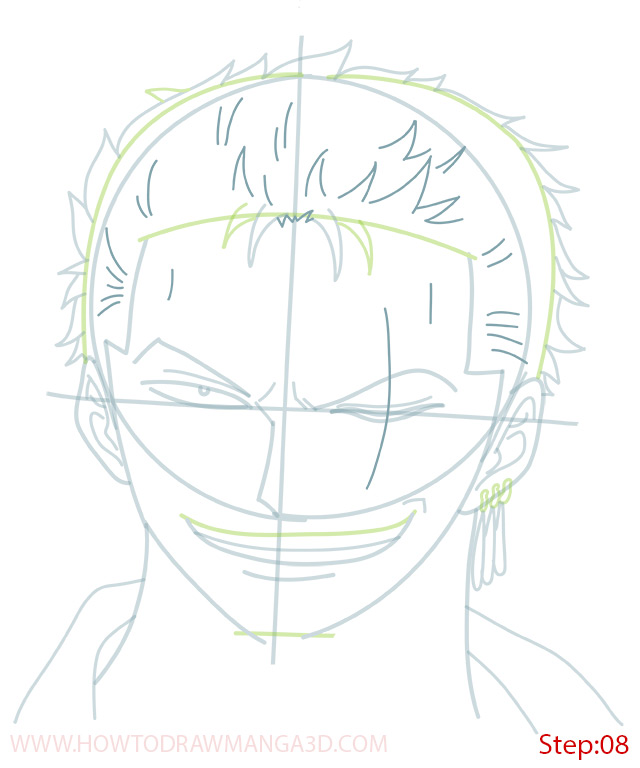
Step 8
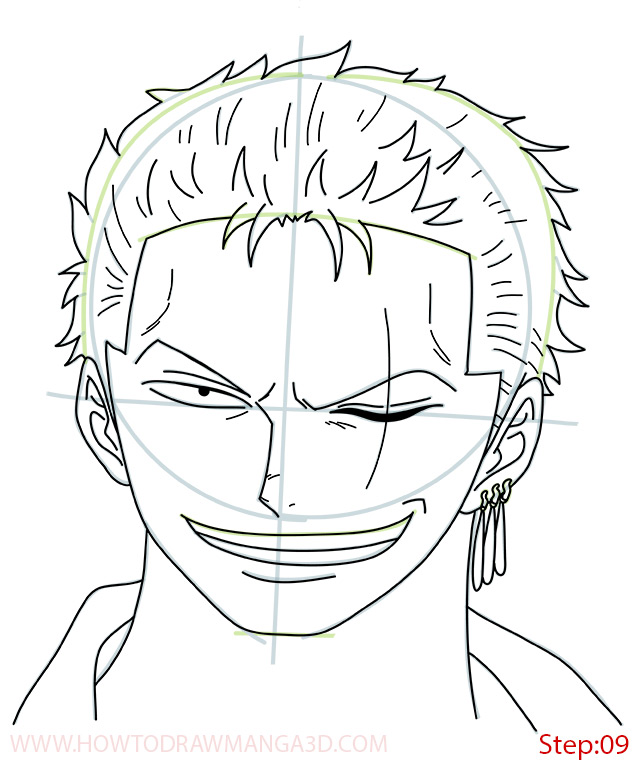
Step 9
Lighten all the construction lines by “stamping” the kneedable eraser and ink the final lines. Make sure to refer to the picture above as there are some new lines here, for example marks on Zoro’s face and hair, so make sure to draw them in pencil before inking.
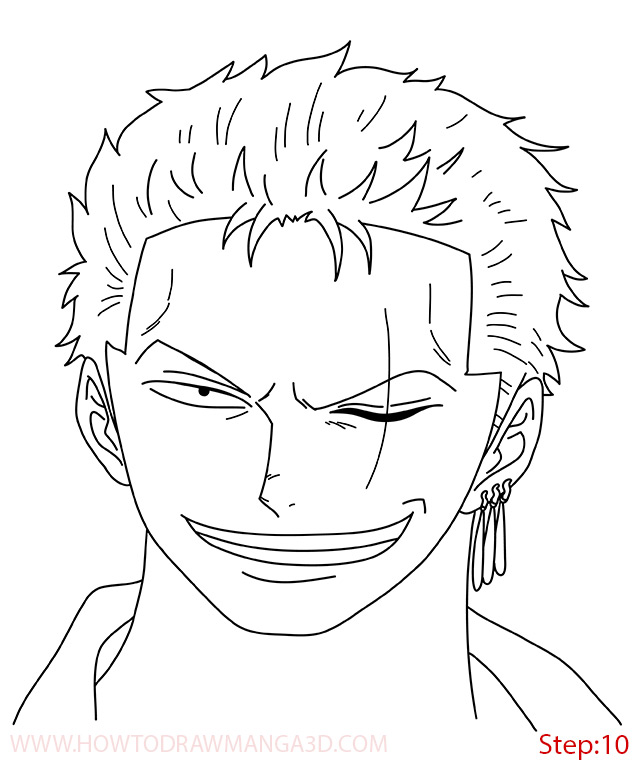
Step 10
Wait till the ink is nice and dry and erase all the construction lines.
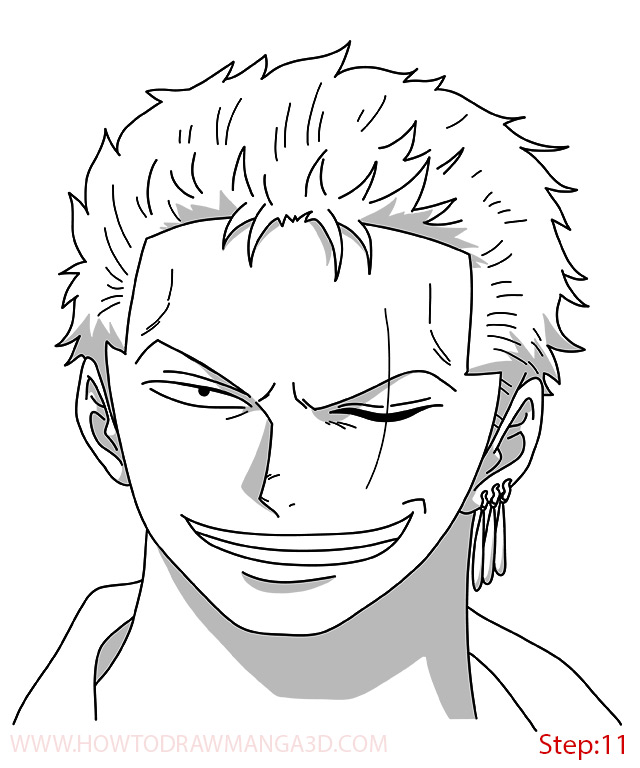
Step 11
Click here for more One Piece tutorials
Make sure to sketch oulines of shaded areas in pencil first and shade it with pencil or gray marker and badass Zoro after timeskip is ready to slash his 3 katanas! ^_-.
If your goal is to become a real Mangaka and design your own manga characters make sure to try to draw Zoro from memory several times. Always compare the drawing to the original and correct any mistakes you see. Do this till you are happy with the result. It doesn’t have to look exactly the same, don’t sweat the details. The point is that you get the main shapes right and that it looks good. This is the best way to build a huge library of manga shapes in your memory that you can use to draw and design your own manga characters ^_-.
Draw with passion! ^_^
Hiroshi






12 comments
PS: there’s alot of spam going on in the forum, again -.-
I can’t see step 6 and step 7
Comments are closed.