

Welcome back mangakas! Today on How to Draw Manga in 3D our drawing tutorial is on Blair from Soul Eater. In the manga, Blair is a shape-shifting cat with the ability to assume a very sexy human form. And today, we’re going to be drawing that human form. Blair is well-known in the manga as a fun-loving and mischief-making cat who can’t help but flirt with Soul and the other Soul Eaters when she takes on her human form. She’s an extremely powerful magic user who single handedly took down the Flying Dutchmen and a gang of Mizune. Not too bad for a puss ^_^. If you’re interested in learning how to draw other Soul Eater characters just click on the Soul Eater tag in the tag cloud on the right of the page to see all of our Soul Eater manga drawing tutorials. Let’s get our materials ready and start today’s Blair tutorial. I would rate this tutorial at the intermediate level, the hair might be a little tricky for beginners but going step by step just about everyone can handle this drawing. Let’s learn how to draw Blair!
Step 1
Step 01: As all of our returning mangakas will already know all of the blue lines you see in this tutorial are only construction lines and we’ll be erasing them later on. So, it’s important not to press too hard on your pencil when drawing these lines. You’ll see our final lines in black towards the end of the tutorial.
We’ll start with a fairly large circle in the middle of our paper as we are only going to be drawing Blair from the neck up today. We should leave space around the edges for Blair’s hair and curls. As you can see in the image above it doesn’t have to be a perfect circle, in fact mine is a little taller than wide. As it can be quite difficult to draw a perfect circle I recommend going around with your pencil a few times very lightly to get an outline of a circle and then draw your actual circle on top of that. It always helps to have a guide ^_^.

Step 2
Step 02: Now that we’ve got our head circle in place, we’ll draw our center and eye lines. Blair is looking straight out at us so we won’t need to worry too much about squashing and size in this tutorial. We’ll draw a vertical center line dividing the head circle in two and extending down below the head shape. Our eye line is a horizontal that’s about a quarter of the way up the head circle.

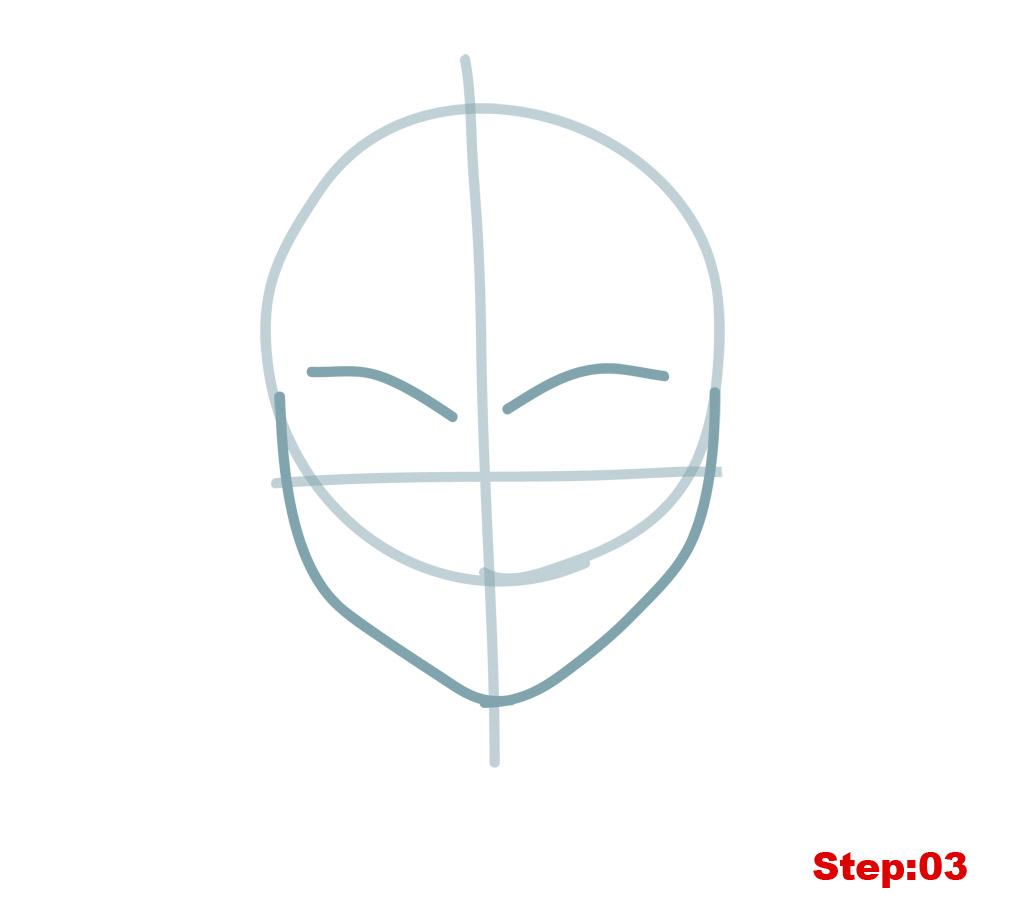
Step 3
Step 03: Great so far everyone. Let’s begin this step by working on Blair’s jaw. The jaw should start on the head circle on either side about half way up, that’s above the eye line. Draw your line curving in to the center line and meeting at a rounded point for her chin. After that, we’ll draw two short curving lines above the eye line on either side of the head for Blair’s eyebrows.
Step 4
Step 04: We’ll take this step from top to bottom. We can begin by drawing Blair’s catty ears. Even in human form, she still strongly resembles her true feline nature. We’ll draw two tent like shapes on the top of the head circle on either side of the head with rounded rather than pointy ends. The bottom of the ears will touch the head circle at about the point where the jaw starts. Next, we’ll do Blair’s eyes. We’ve tried to choose an expressive pose for Blair where she is winking at us with the eye on the right. So, we only need to draw a short slightly curving line on the eye line on the right for her eye there. On the left we’ll draw a half circle just above the eye line and beneath it a slightly irregular line that turns up on the left but doesn’t meet the upper line, it should be left unfinished. Lastly, we’ll draw Blair’s neck with her collar line. Start by drawing two vertical lines that curve out ever so slightly at the bottom from under the jaw. Add a line connecting those two vertical lines to get her collar and we’re all done with this step.

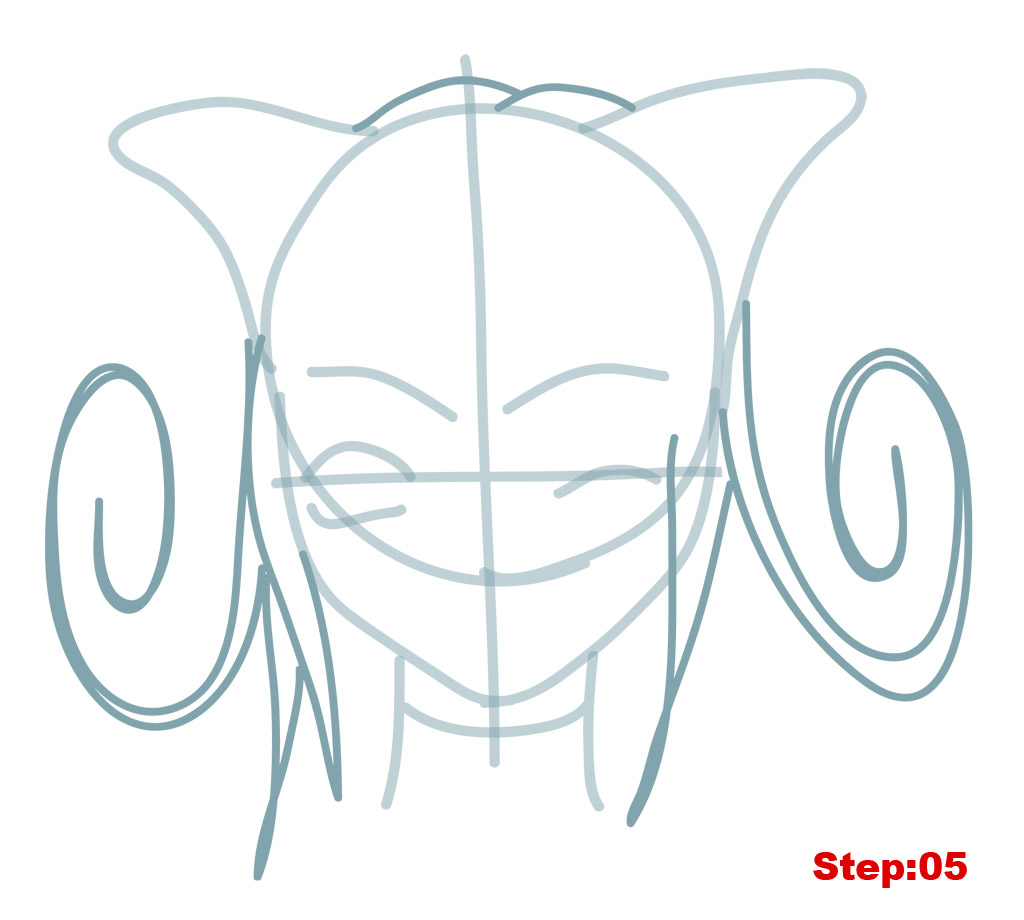
Step 5
Step 05: Time to work on Blair’s hair and signature curls. As we’ve noted in other tutorials manga hair is not only really distinctive but it can also be quite difficult to get the first time. But don’t despair, if you’re unhappy with the way yours looks, feel free to erase and take another stab at it. Practice makes perfect ^_^.
You might want to begin this step by lightening all of the construction lines we’ve made so far. We’ll start on the left and then do the right and top of her head. We should begin with the lock of hair on the right that is closest to her face. We’ll draw a spike pointing down from about the bottom of the ear and then back up to about the half way point on the jaw. Next, we’ll give the curl a try by drawing two spiraling lines that come to a point. And then, we’ll draw the longer hair spike in the middle between the spiral curl and the first spike. Then we’ll move over to the right and here we’ll actually begin with spiraling hair curl. And once we’ve got that we’ll add the long hair spike pointing down. You’ll notice that it overlaps the jaw and face and stops above the eye line. As we’ll see, this is an example of our overlapping 3D principle. Before moving on, let’s add the two curving lines on the top of her head.
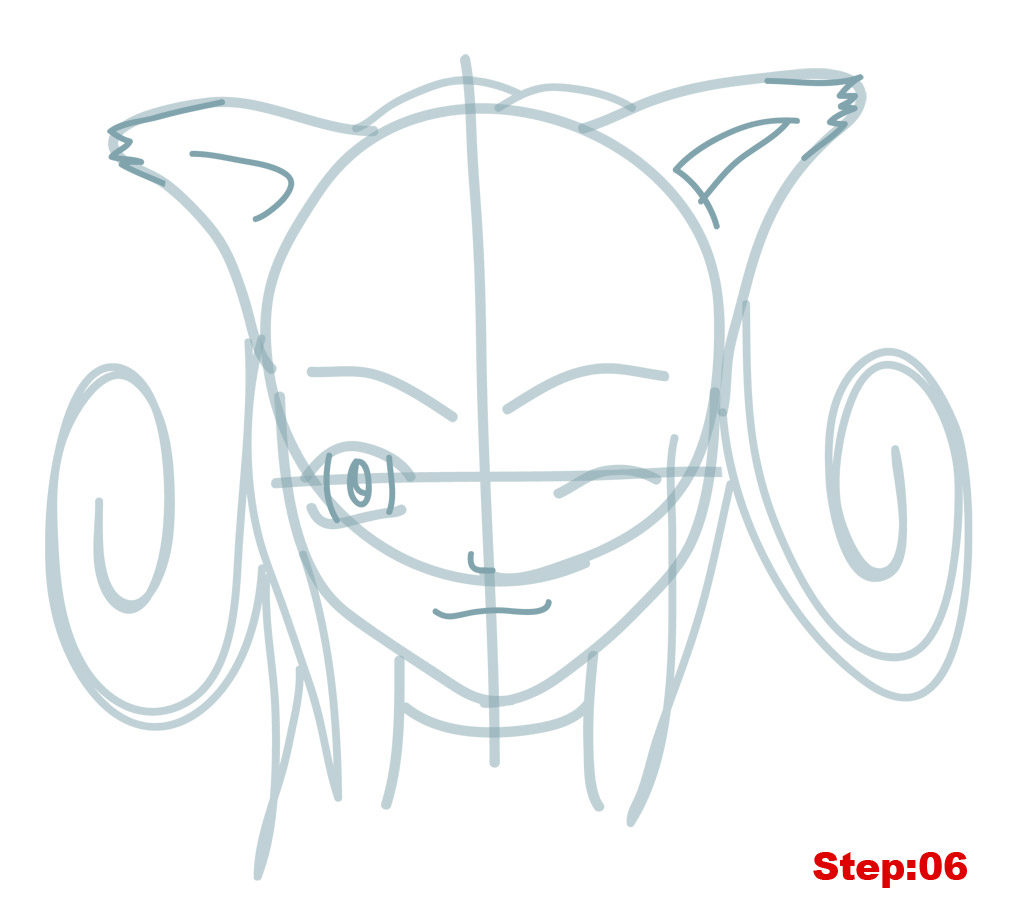
Step 6
Step 06: Whew! That was certainly a big step. And now, we’ll move in to work on some details of her facial features and we can do this step from top to bottom beginning with the ears. We need to rough up the smooth curves at the tips of her ears to suggest fur. Once you’ve got that we can add the hook shape to the inside of the ear on the left and a slightly curved triangle shape to the inside of the ear on the right. Notice that the line which forms the base of the triangle shape is long. Next, we’ll move on to Blair’s eye. We’ll draw two slightly curving lines between the lines we drew in Step 03. And then, we’ll add a vertical ellipse inside the eye on the eye line. Inside the ellipse we’ll add another line to divide the pupil. Just to the left of the center line we’ll add a small hook line for her nose. And beneath that a line for her mouth that curves up at the ends.
Step 7
Step 07: Fantastic work so far everyone. We’ve got one more hair step in front of us and this one is on Blair’s bangs. They are made up of between 8-10 curving hair spikes and are longest on the very far sides and right in the middle. It’s important that the bangs overlap her eyebrows on both the left and the right. It might be a good idea to draw 7 or 8 hair spikes and then add a few more between them or by dividing any thick spikes into two. Once you’ve got her bangs done to your satisfaction we’ll move on.

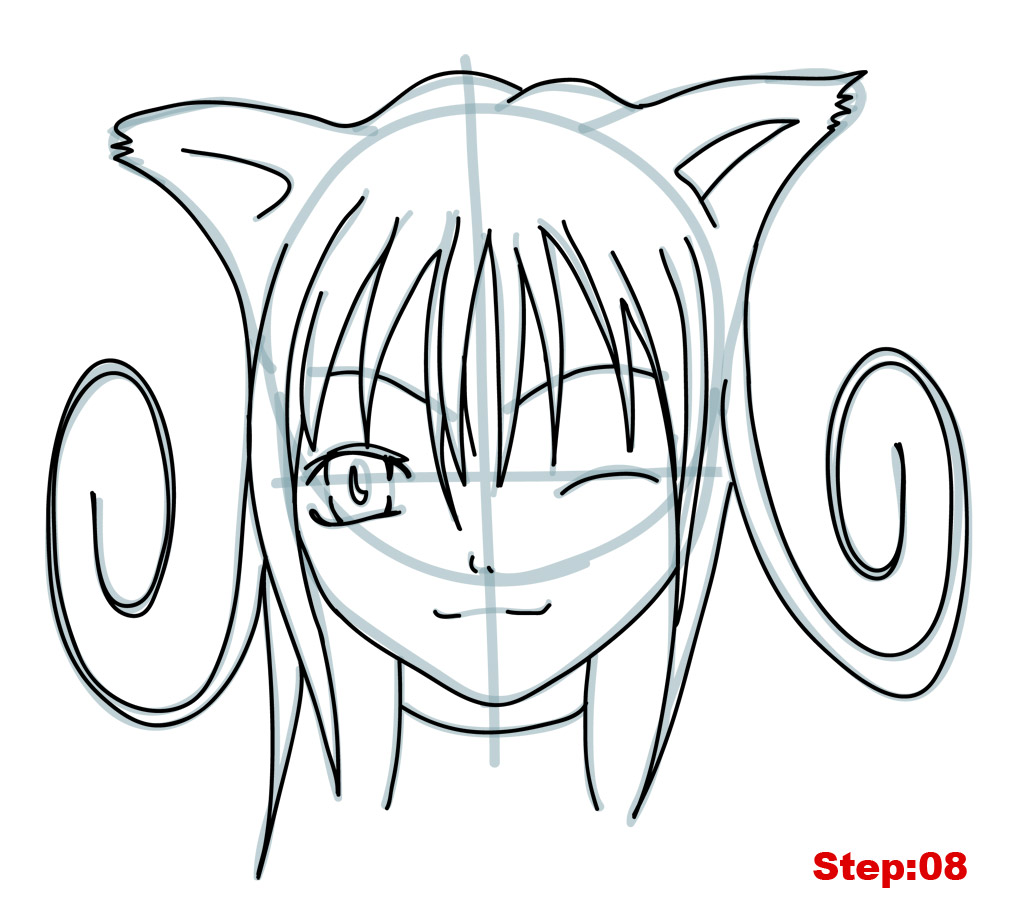
Step 8
Step 08: That does it for our construction lines! Using your eraser lighten all of the construction lines we’ve made so far and take out your pen and begin tracing your final lines. It’s important to remember while tracing that we only trace the actual final lines we want to see and not all of the construction lines. So, for example, we should definitely do her hair and bangs before we touch her eyebrows as the eyebrows are partially hidden behind the hair spikes and we won’t see them (overlapping 3D principle). It’s also crucial that we don’t trace her full eye on the right but leave a small gap in the middle of our vertical lines. There’s also a gap in the mouth line and her nose is but a fraction of the construction line we drew for it. Finally, don’t trace the whole circle inside the eye on the left but just the lower half.
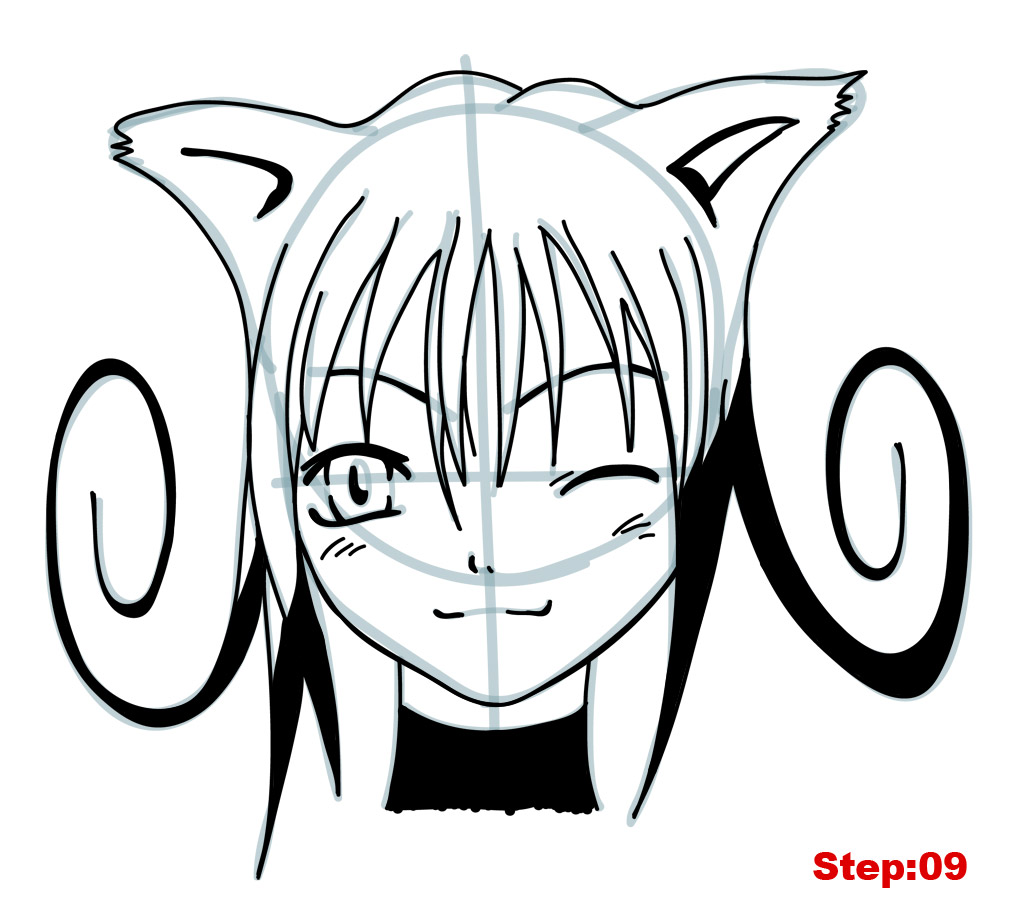
Step 9
Step 09: Excellent work! Let’s take a few minutes to work on line quality (thickening our lines) and shading to add depth to our drawing. We’ll thicken the lines inside her ears and around the eye on the left and we’ll thicken the winking eye on the right. Then we can fill in the hair curls on the left and right and the bottom halves of the hair spikes on the left and right but not those for her bangs. Also be sure to fill in the lower half of Blair’s neck. And then, returning to the face for a moment, we can add some small dash lines under her eyes on both sides for some wrinkles and just above the inner corner of her eye on the right.
Step 10
Step 10: After your ink dries just use your eraser to completely erase your all of the construction lines you might still be able to see.

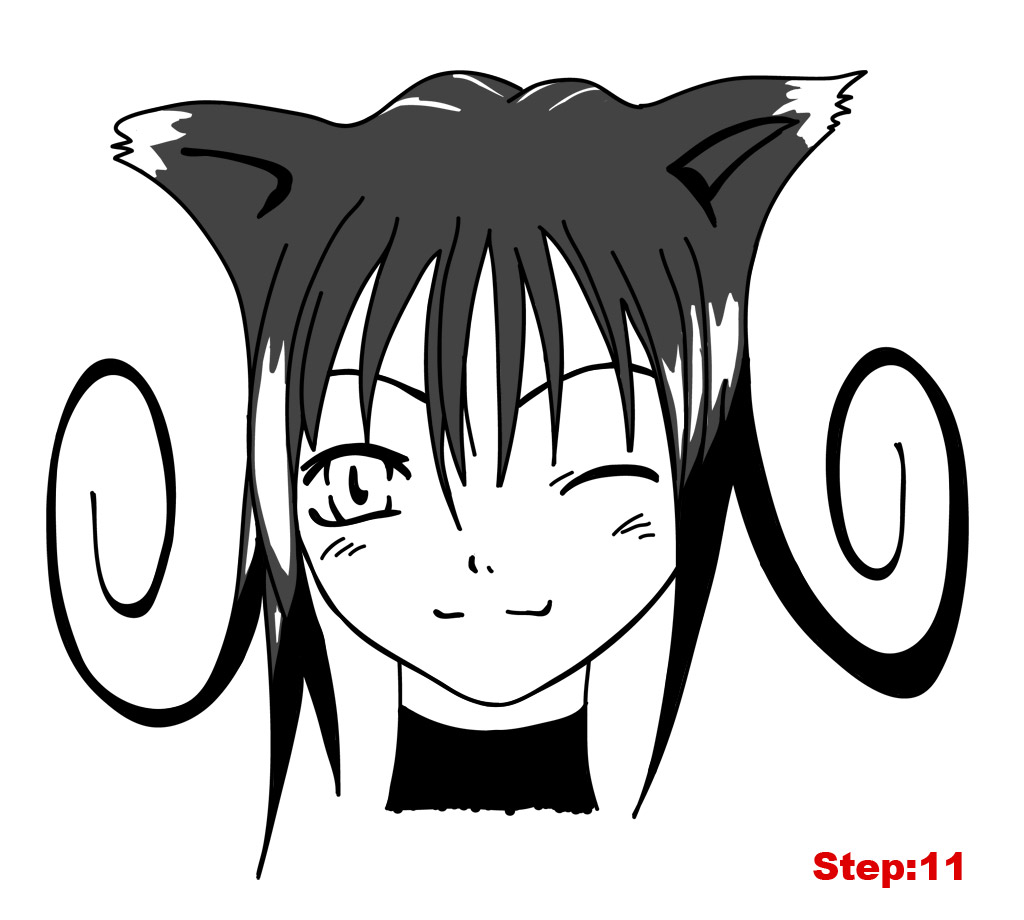
Step 11
Step 11: As our last step we’ll shade in Blair’s hair a bit. Although a mechanical pencil is great for construction lines, a standard No. 2 writing or art pencil is better for shading as you can use the side of the lead to shade much easier than you can the tip of a mechanical pencil. So using our pencil we’ll shade in the top of half of Blair’s hair but we’ll leave a few empty spots on the right and left as glossy reflective spots. Also, we should leave the tips of her ears empty as she actually has white tips at the end of her ears.
When you’re all finished shading stand back and take a look at Blair from Soul Eater. Doesn’t she just make you want to purr? If your goal is to become a great mangaka make sure to draw Blair again from memory. Then compare the final drawing with the original and correct any mistakes you might have made. Try once again from memory. This is the best way to build a huge library of shapes and get the tracing experience necessary that you can use in the future for your own manga characters.
Draw with passion! -_^
Hiroshi


1 comment
Comments are closed.