

Welcome mangakas! Today on How to Draw Manga in 3D our drawing tutorial is on the Baby from the Beelzebub Manga. Also known as Baby Beel, this tiny character isn’t your ordinary baby. He’s the son of the great demon king. Oga, along with the baby’s maid Hilda, are charged with looking after Baby Beel as he grows up. This special bond between them results in Oga gaining extraordinary demon powers, the downside is that he can’t be more than 15 meters away from Baby Beel at all times. I’m not sure if I’d trade my freedom for some super demon powers, but then again, maybe I would ^_^. Baby Beel is fairly easy to draw, the hair might be a little difficult, but overall this tutorial is recommended for everyone. This is our first Beelzebub tutorial, if you’re interested in learning how to draw other Beelzebub characters, be sure to request a character by clicking on the request tutorial button at the top of the page. Let’s get our materials ready and learn how to draw Baby Beel.
Step 1
Step 01: As all of our returning mangakas will already know all of the blue lines you see in this tutorial are only construction lines and we’ll be erasing them later on. So, it’s important not to press too hard on your pencil when drawing these lines. You’ll see our final lines in black towards the end of the tutorial.
We’ll be drawing Baby Beel’s whole body in today’s tutorial. So, let’s begin with the head and body shapes. Let’s start with our head shape by drawing a square with rounded corners in the center-right of our paper. Below that we’ll draw a vertical rectangle shape for the body. You’ll notice how the rectangle sticks out more on the left than on the right, while the head on the right overhangs the rectangle.

Step 2
Step 02: Time for some arms and legs! Let’s begin with the arms by drawing two long “c” shapes on either side of the rectangle just below the head. Next, we’ll draw the leg outlines. We’ll draw two vertical ellipses (higher than wide) starting just under the arms and stopping at the bottom of the body shape. The ellipse on the left should be thinner, higher and slightly more tilted than the fatter one on the right.

Step 3
Step 03: Let’s work on some face and head features in this step. Let’s begin with the ears. We’ll draw two cup handle shapes, one on either side of the head about half way up, but the ear on the right should be thinner than the one on the left. Next, we can add the sizable circle in the bottom center of the head just to the right of center for Baby Beel’s pacifier. Then, let’s move up and we’ll draw the curved line across the top of the head for a hair line. We’ll add another hair line around the head starting on the left where the head and body shapes meet and curving around to stop at the midpoint of the ear on the right.

Step 4
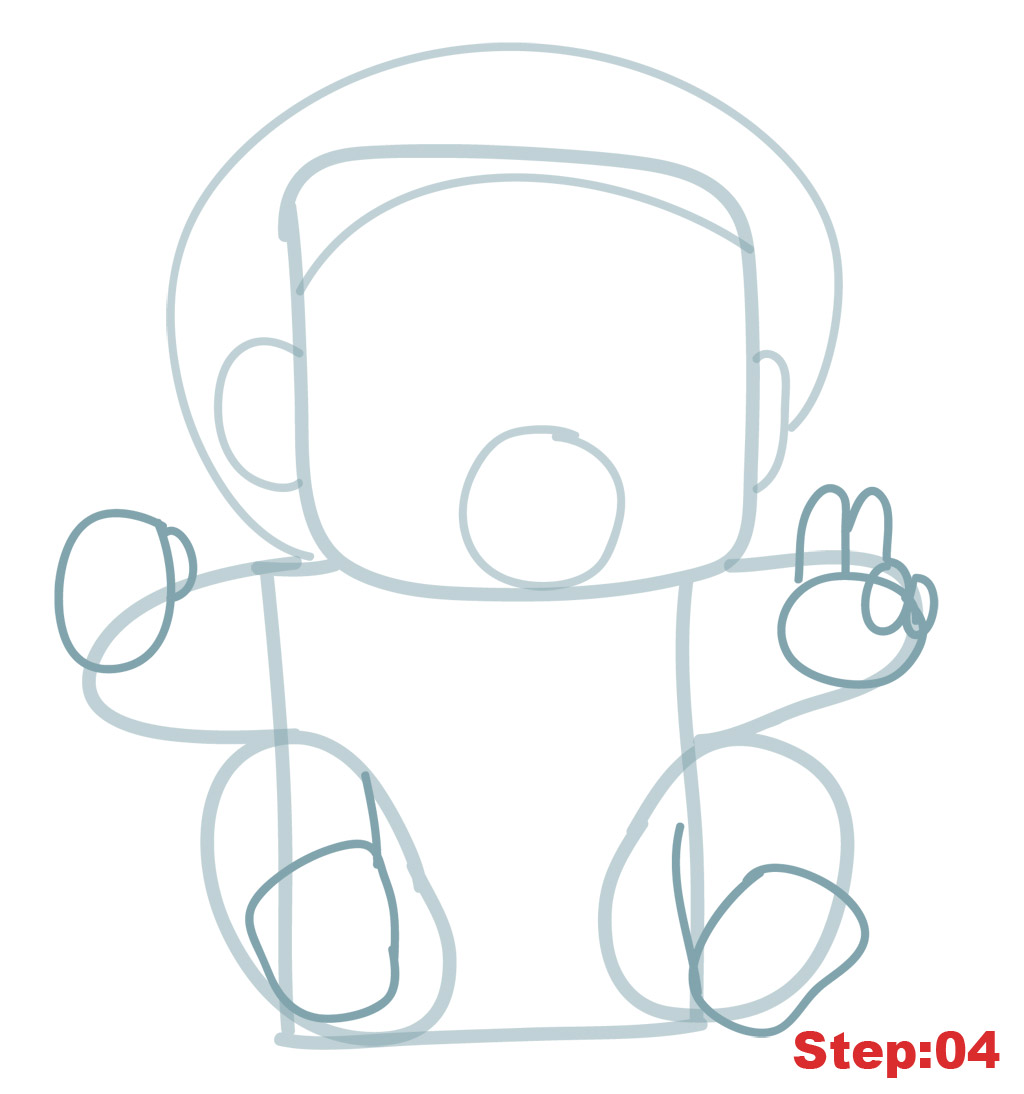
Step 04: OK, mangakas, let’s draw Baby Beel’s hands and feet. We’ll start with the hand on the left, which should look like a coffee cup. We’ll draw a vertical ellipse for the hand overlapping just the top part of the arm and then add a little handle to the ellipse for his thumb. On the right, we’ll start with a horizontal ellipse almost completely inside the arm shape. Then we’ll draw the two ‘peace’ fingers by drawing a tall rounded “M” shape. We’ll add another small ellipse for his third finger that should overlap about half of the hand. And then, a final smaller ellipse on the end for his pinky finger. Moving down to the legs, let’s start again with the foot on the left. We need to draw an ellipse like shape that’s more blocky on the upper end for each foot. The one on the left is inside of the leg shape. Then we’ll draw a line connecting the inner-upper corner of the foot to the leg shape. On the right, start with your foot shape but this time the upper end of the foot should overlap the leg shape. We’ll draw a line for the underleg starting at the inner- bottom corner of the foot and curving up about half way up the leg. It shouldn’t touch the top of the leg shape.
Step 5
Step 05: It might be a good idea at this point to use your eraser and lighten all of the construction lines we’ve made so far. After that, let’s take a look at the head and we’ll draw our center and eye lines. The center and eye lines are straight lines and they divide the head into roughly four equal parts. Below the eye line on either side of the head, we’ll draw two lines for his lower eye lids that curve up slightly at the ends. Above the eye line and on either side we’ll draw two more lines for the upper lids that are a little flatter than the lower lines.

Step 6
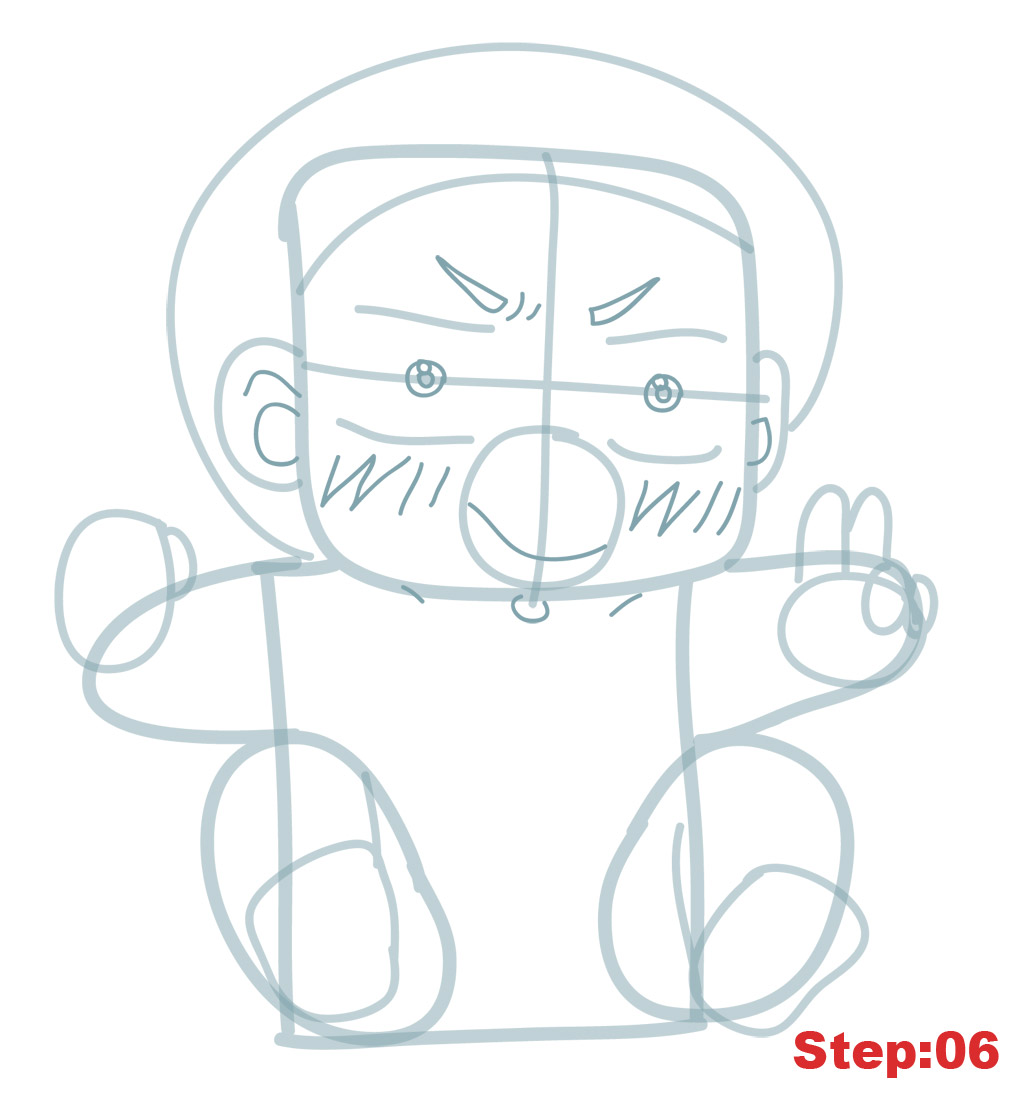
Step 06: Great work so far! Let’s stick with the face and add some more details here. We’ll go from top to bottom. We’ll begin with the eyebrows by drawing two thin carrot shapes above the eye lids and titled towards the center of the face. In the lower corner of the eyebrow on the left we’ll add two small wrinkle lines. Then, for the eyes we’ll draw two circles directly on the eye line. Inside each of these, we’ll draw another circle also directly on the eye line. And, above and to the left of the smaller second circle, another small circle making a total of three. Inside each ear, we have to add the smaller “c” shape with the “c” being much smaller in the ear on the right than on the left (squashing 3D principle). Also, there is another line inside the ear on the left at the top. Further down, let’s add the curving line to Baby Beel’s pacifier. Next, try to draw the marks on his cheeks which should be a “W” followed by “ll”. Before moving on, there’s a small circle just under the pacifier that we have to draw for Baby Beel’s Adam’s apple. And there are two small lines just at the top of the body shape that suggest where his shoulders will be.
Step 7
Step 07: Got all that? Great, cause it’s time to take a shot at Baby Beel’s hair. It’s definitely not as hard as some of our other tutorials, and remember that if you’re not happy just go ahead and erase and give it another try. It’s also possible to do some correcting when we draw our final lines so no worries. The front of his hair is pretty straightforward. Just use the hair line across the top of the head as a guide and draw lots of little spikes across his forehead some of which should overlap. For the rest of his hair, it’s probably easiest to start just below the ear on the right. Again we’ll use our ‘halo’ as a guide and we’ll draw some scratchy hair spikes all around his head. The hair should stop at the ear on the right and just overlap the top of that ear. When you’re happy with your hair, we’ll move on.

Step 8
Step 08: Just one more construction line step here. We’ve got to add his fingers and toes as well as his penis. Let’s begin with the hand on the left inside of which we have to draw the fingers. It might be easiest to begin with the lower curlicue for the pinky finger and then add the other fingers on top of that. Then, we’ll draw the two lines for the forearm connecting the hand to the arm shape. On the right, we have to draw the thumb inside the hand shape and two more lines. Now, moving down to the feet, we have to draw five small circles on the end of each foot for Baby Beel’s toes. And, in the foot on the left, we should draw the irregular shape for the pad on his foot. Between the legs we can draw the large “U” shape and the thinner “U” for his pee-pee. Then, we’ll draw two curving lines, one on each side, connecting the bottom of the leg for his butt. Before moving on, don’t forget to draw the mark for his belly button.

Step 9
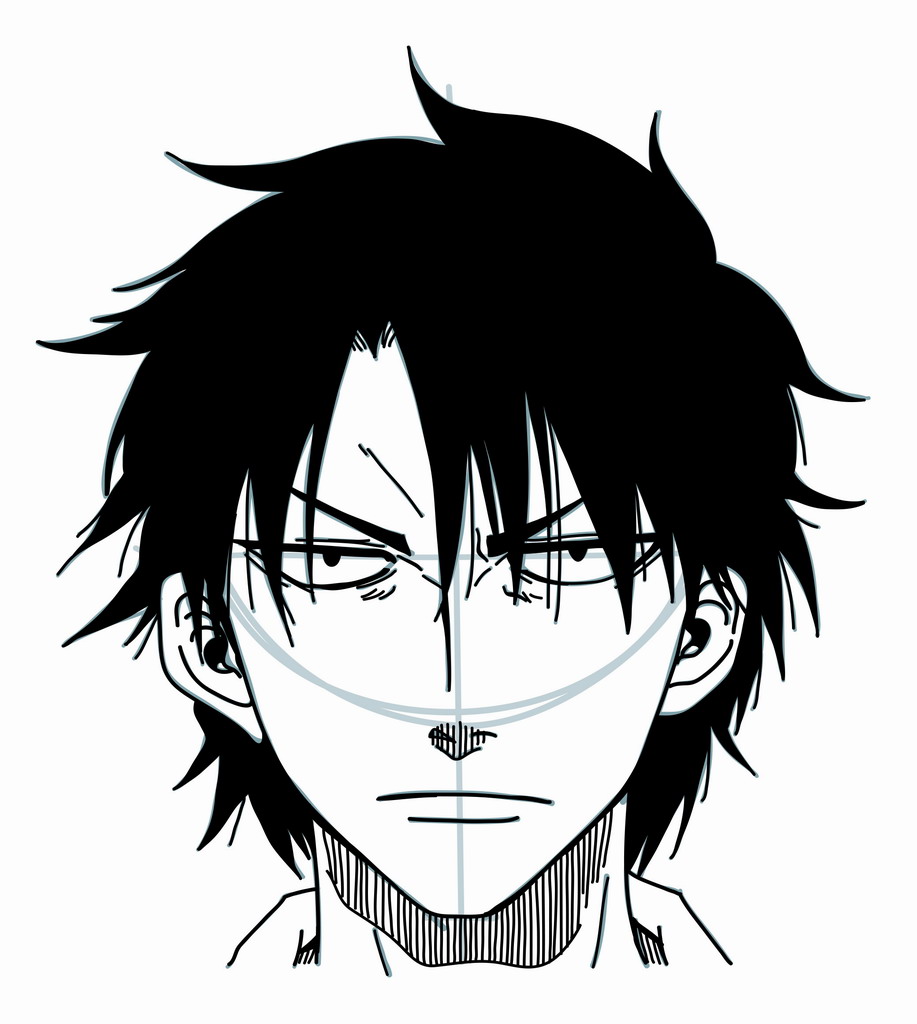
Step 09: That’s it for our construction lines, mangakas. Take out your eraser and lighten all of the lines we’ve made so far. Then, taking your pen begin to trace out your final lines. It’s important to remember that we only want to trace what can and should be seen and not all of the lines we drew for our construction lines. As you trace your final lines for Baby Beel, some things to keep in mind are: as you can see in the image above, Baby’s cheeks overlap the corners of his shoulder and so we don’t trace those, the toes also overlap slightly, also the lower leg starts at the testicles and not on the body shape we drew, also the upper smaller circle in the eye in untraced creating an empty spot in the upper corner of both eyes and, lastly, the lines that mark his upper and lower eye lids are actually shapes and not just lines so we’ll make them bigger here.

Step 10
Step 10: When you’re ink dries, just use your eraser to completely erase any remaining construction lines you might see. You could just stop here and have a pretty good Baby Beel drawing but we’re going to do one more step to work on line quality and do a little shading, hopefully adding some more dimensionality to our image.

Step 11
Step 11: As for line quality, I’ve thickened the bottom of his head a little bit and the tops of both legs. Then, I’ve shaded under his arms, the bottoms of his feet, just beneath his head and the bottom part of his pacifier using straight and diagonal lines. Lastly, we can fill in completely his eyebrows and the shapes for his eye lids, both top and bottom. And that’s it. Stand back and take a look at Baby from Beelzebub! If your goal is to become a great mangaka make sure to draw Baby Beel again from memory. Then compare the final drawing with the original and correct any mistakes you might have made. Try once again from memory. This is the best way to build a huge library of shapes that you can use in the future for your own manga characters.
Draw with passion! -_^
Hiroshi


1 comment
Comments are closed.